
The DATE function in Microsoft Excel is used to assemble a date from three separate pieces of data, being the year, month and day. This is useful if the information is provided in separate columns and you need to combine them. DATE will take the year, month and day and convert them to a single serial number representing the date. The result is automatically formatted as a date.
The general function to convert numbers into a date is =DATE(year, month, day).
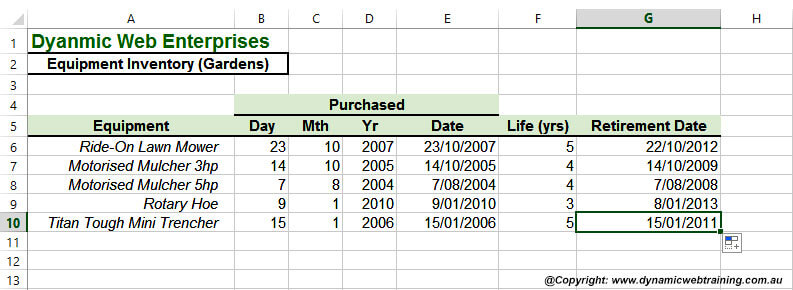
Ensure that the data you are working with in your Excel worksheet looks similar to the screen capture in Step 1.
Date Function: How-to
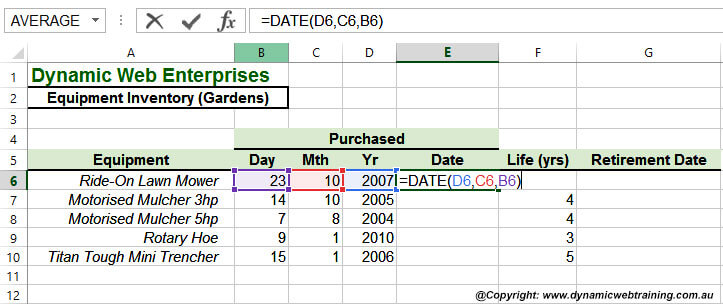
STEP 1:
Select cell E6, then type in =DATE(D6,C6,B6). Press CTRL+ ENTER to enter the formula.
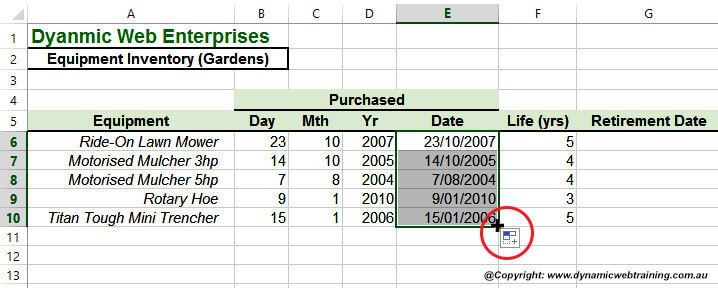
STEP 2:
Double-click on the fill handle to copy the formula from cell E6 down to cell E10.
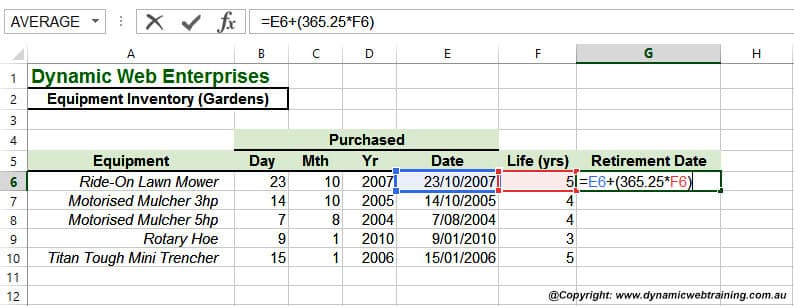
STEP 3:
Continue on to click in cell G6 and type =E6+(365.25*F6), then press CTRL+ ENTER to enter the formula.
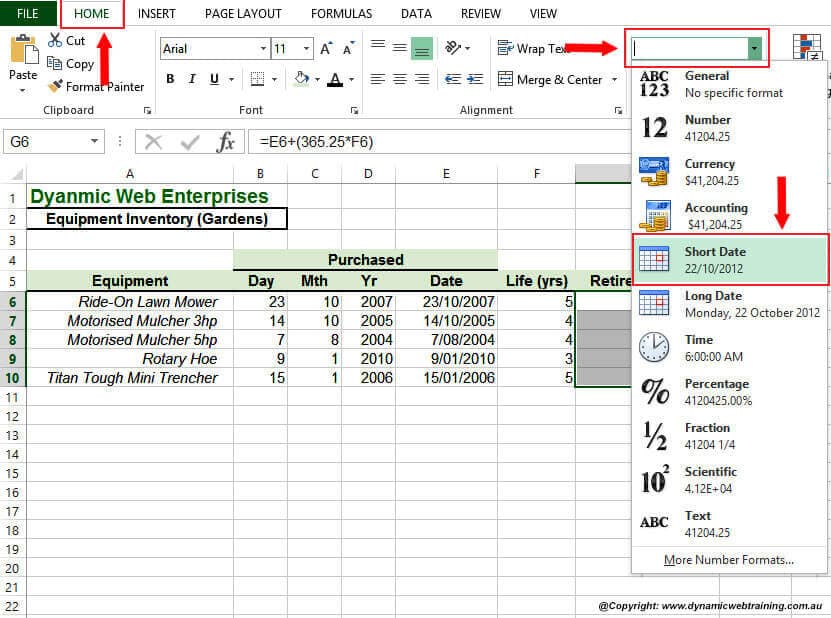
STEP 4:
Click on the HOME tab, click on the drop arrow for the Number Format in the Number group, and then click on Short Date.
STEP 5:
Double-click on the fill handle to copy the formula from cell G6 down to cell G10.
Handy To Know
When you type a date into a worksheet, Excel automatically recognises and displays it as a date while recording it as a serial number.
The DATE function topic is covered in our Intermediate Excel course