
Mail merge is a powerful feature that allows you to send personalized emails to a large number of recipients without manually typing each message. While Outlook is your email client, the mail merge process is primarily driven by Microsoft Word, which then leverages Outlook to send the emails.
Let’s dive into how you can set up and execute a mail merge.
Step 1: Prepare Your Recipient List
Before you start, you’ll need a list of recipients. This can be an Excel spreadsheet, an Outlook Contacts folder, or another data source. For this guide, we’ll assume an Excel spreadsheet, as it offers the most flexibility.
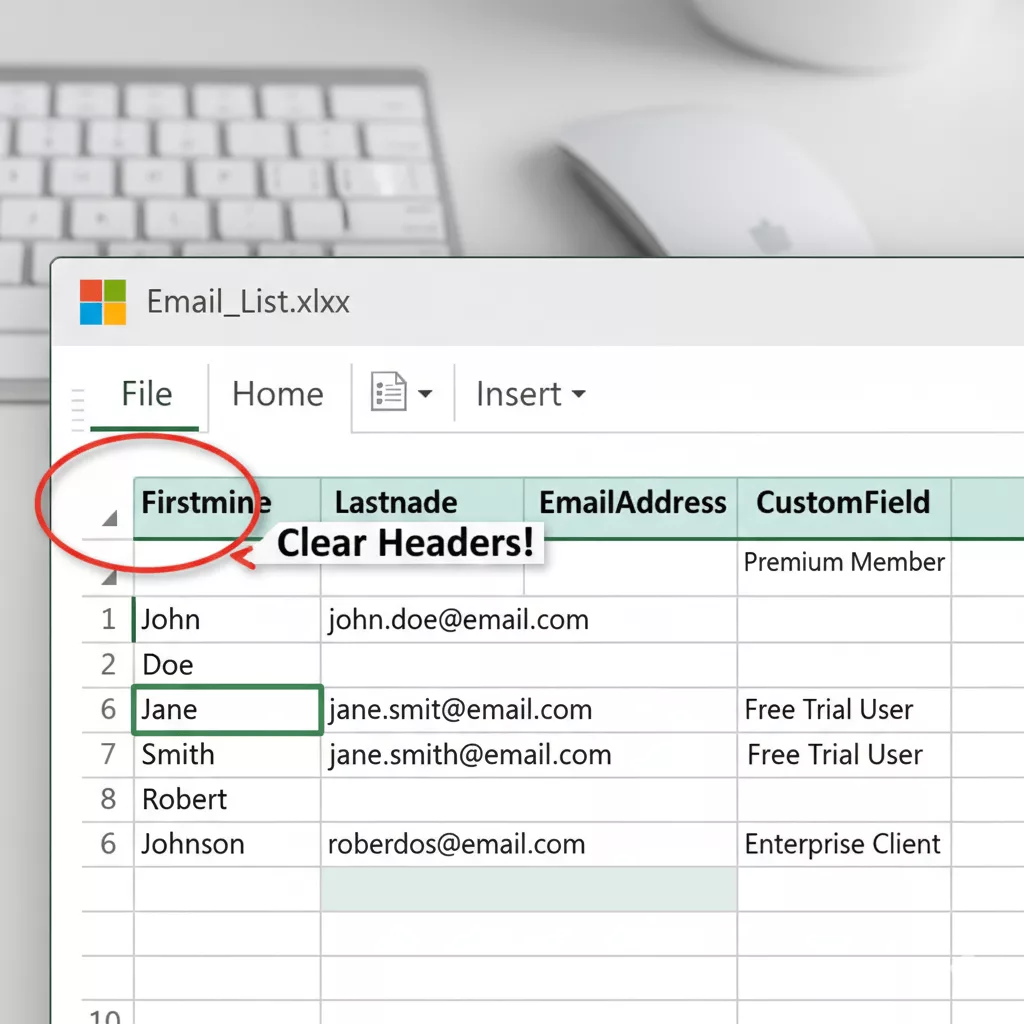
Important: Ensure your Excel sheet has clear column headers (e.g., “FirstName“, “LastName“, “EmailAddress“).
Here’s an example of what your Excel sheet might look like:
Step 2: Open Microsoft Word and Start a New Document
The mail merge process begins in Microsoft Word. Open Word and select a blank document.

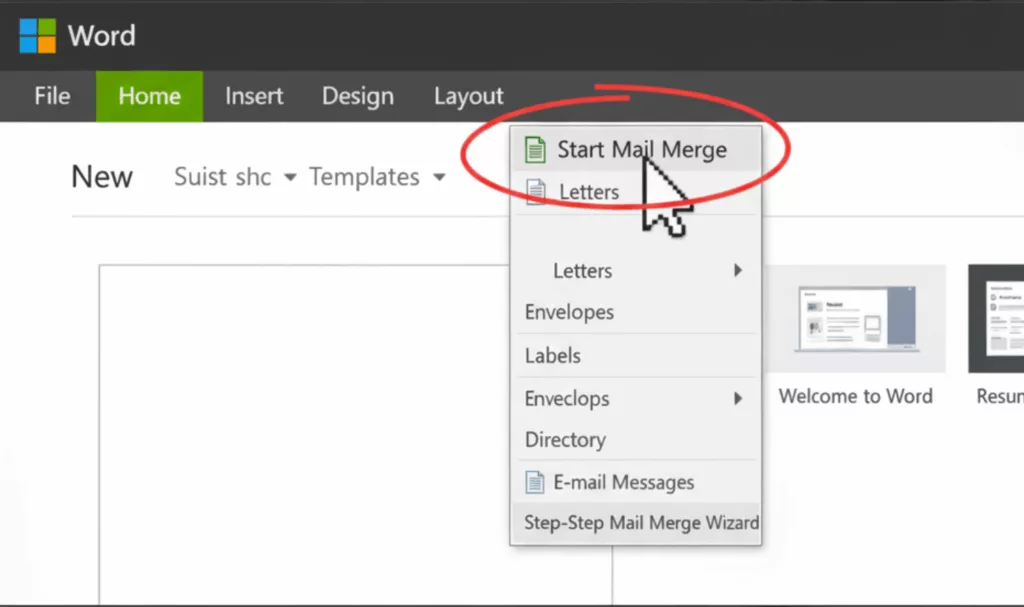
Step 3: Access the Mailings Tab and Start Mail Merge
Navigate to the Mailings tab in the Word ribbon. Click on Start Mail Merge and then select E-mail Messages. This tells Word that you intend to create an email merge.
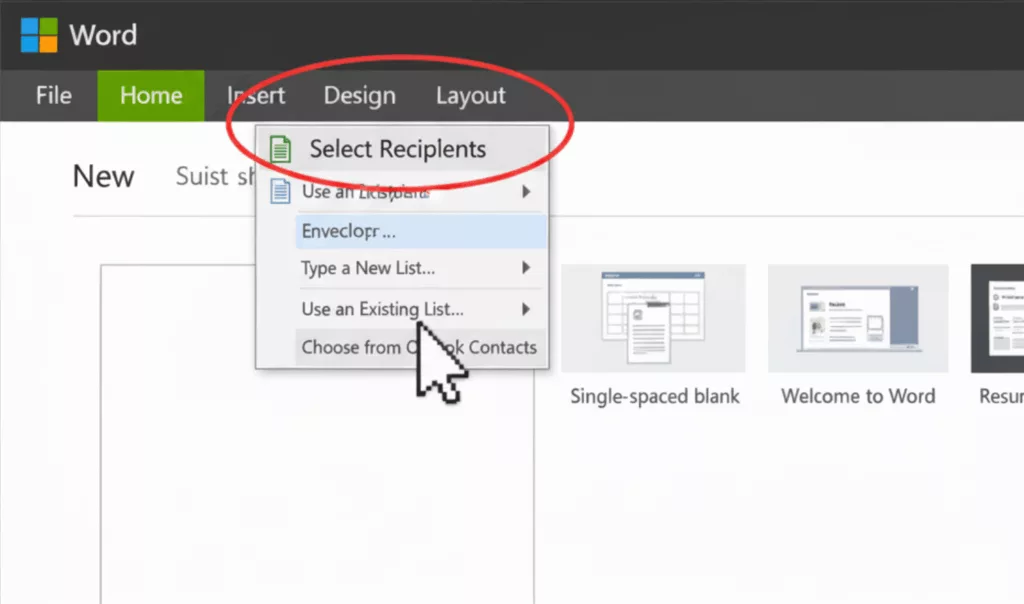
Step 4: Select Your Recipients
Now you need to link your Word document to your recipient list. Click on Select Recipients in the Mailings tab, then choose Use an Existing List…
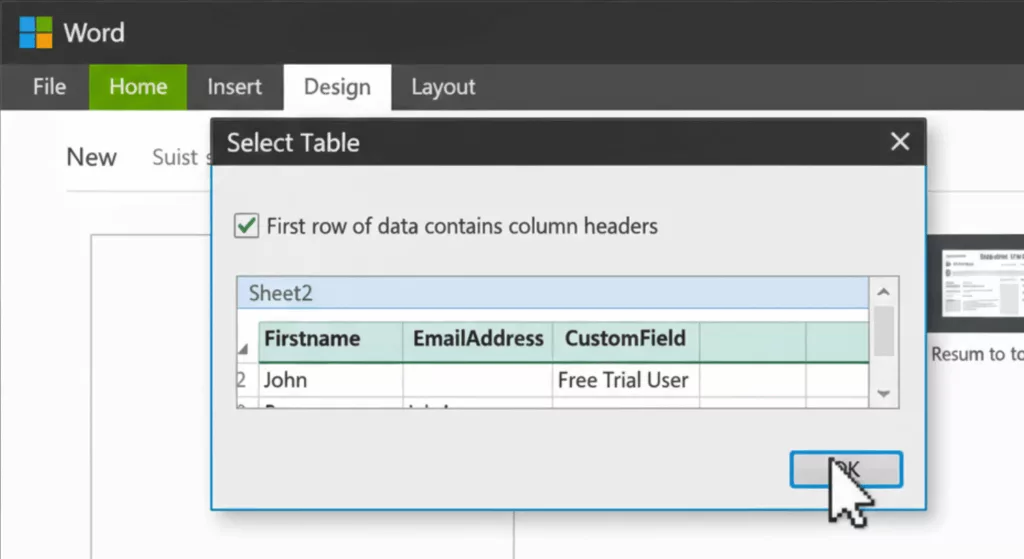
Navigate to your Excel file, select it, and click Open. If your Excel file has multiple sheets, Word will ask you to select the correct one. Make sure to check the “First row of data contains column headers” box.
Step 5: Write Your Email Content
Now, write the body of your email. This is where you’ll insert placeholders (merge fields) for personalized information.
For example, instead of “Hello,” you can insert a merge field for the recipient’s first name.
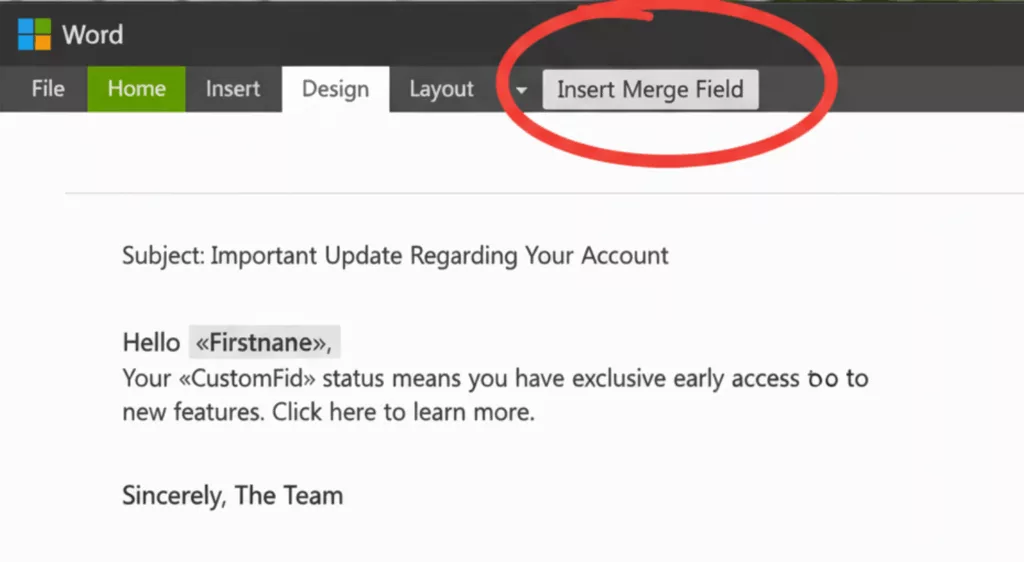
Click on Insert Merge Field in the Mailings tab. You’ll see a list of your column headers from your Excel sheet. Select the fields you want to insert.
For a professional look, always include a relevant subject line. You’ll specify this later.
Step 6: Preview Your Results
It’s crucial to preview your merged emails before sending them to ensure everything looks correct. Click on Preview Results in the Mailings tab.
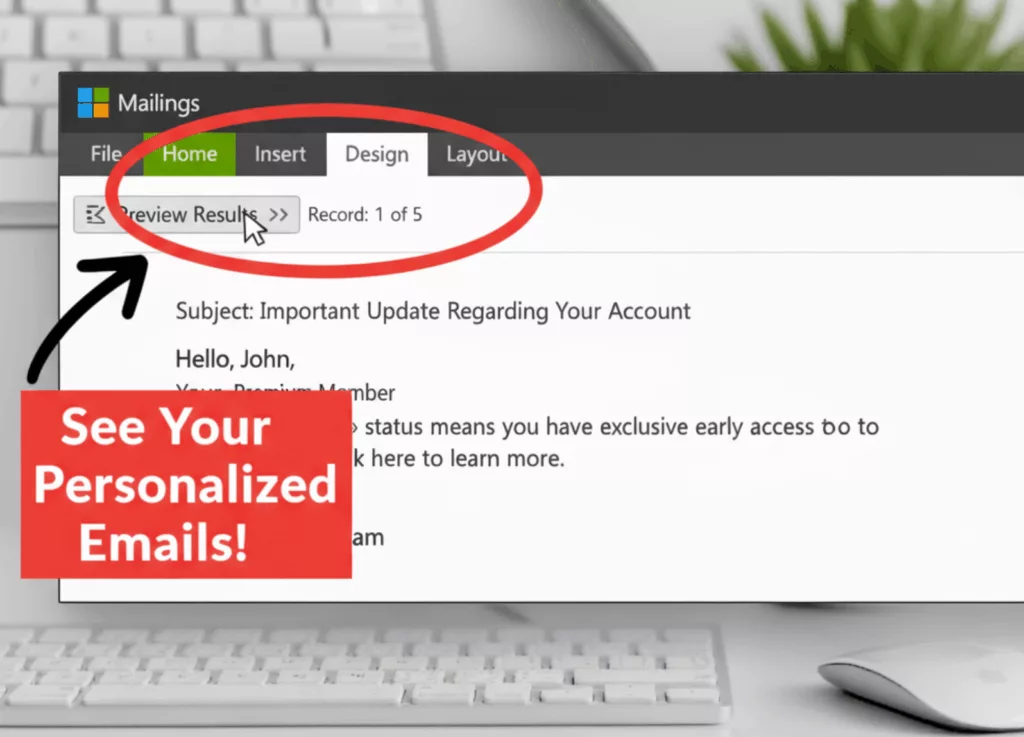
You can use the arrow buttons to scroll through each merged email and check for any errors. If you spot any issues, go back and edit your Word document or your Excel list.
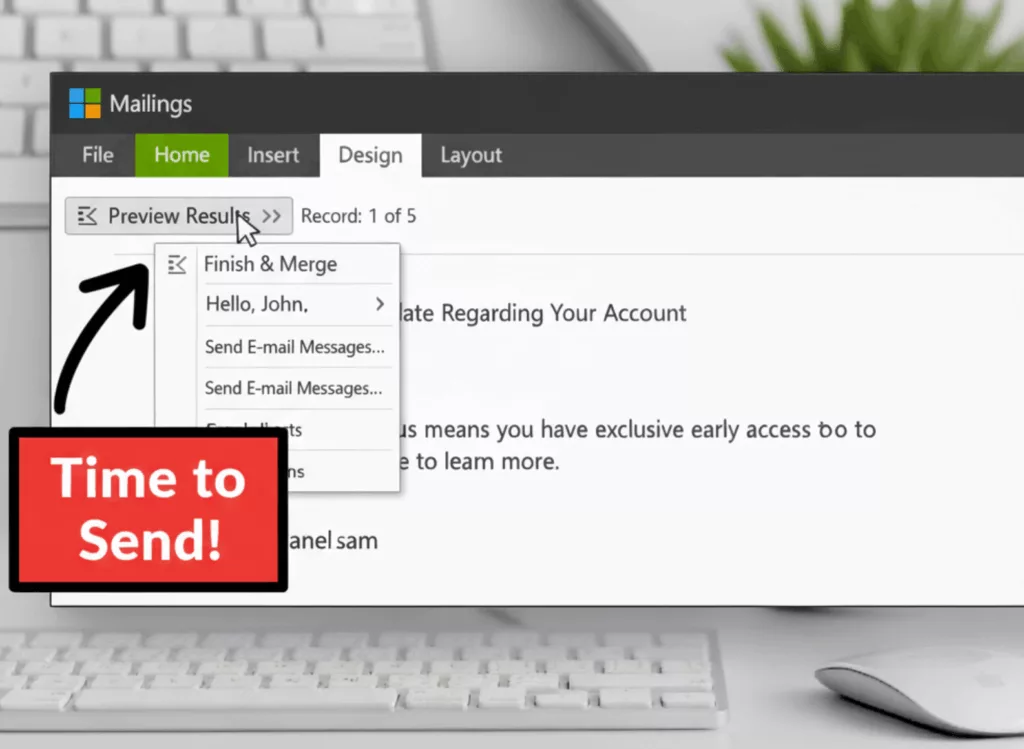
Step 7: Finish & Merge
Once you’re satisfied with your preview, it’s time to send! Click on Finish & Merge in the Mailings tab, then select Send E-mail Messages…
A dialog box will appear. Here’s what to fill in:
- To: Select the column header from your Excel sheet that contains the email addresses (e.g., “EmailAddress”).
- Subject line: Type the subject of your email. This will be the same for all recipients.
- Mail format: Choose HTML for rich text emails with formatting, or Plain text if you prefer.
- Send records: You can choose to send all records, the current record (for testing), or a range of records.
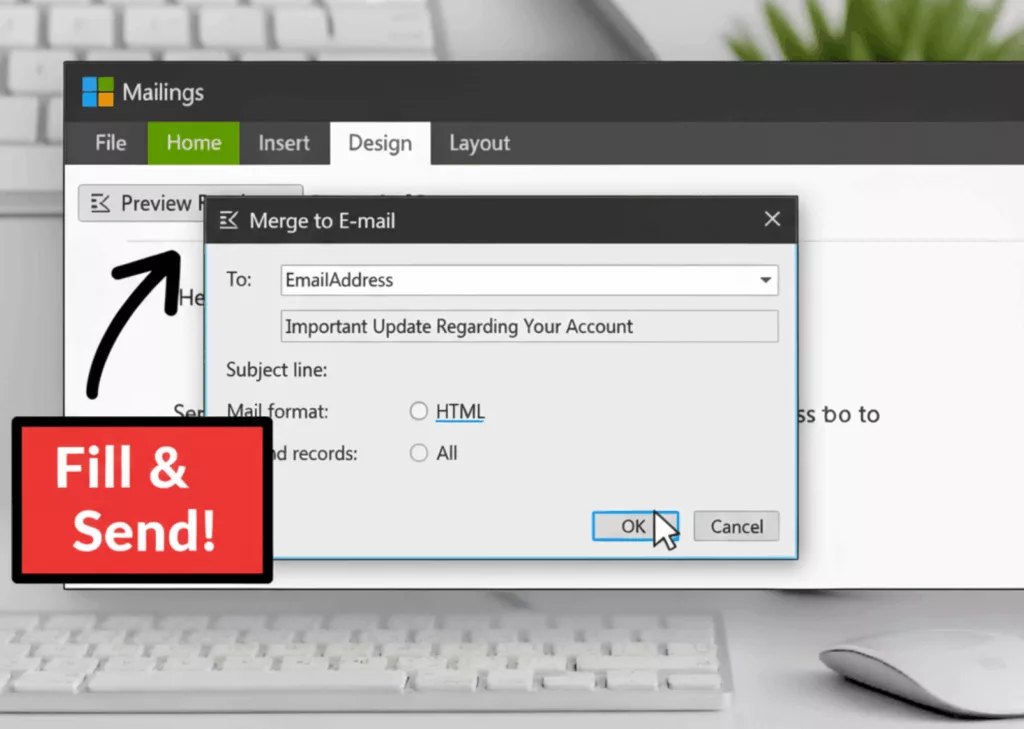
lick OK, and Word will use Outlook to send your personalized emails!
Conclusion
Mail merge in Word (via Outlook) is an incredibly efficient way to communicate with many people personally. By following these steps, you can save valuable time and ensure your messages are tailored to each recipient. Happy merging!