
A Practical Walkthrough Using Microsoft Copilot Studio
1. Introduction
Custom Copilot agents are task-specific AI assistants you build for your organization’s unique needs. Unlike the general Microsoft 365 Copilot chat, these agents are tailored to specific business workflows and grounded in your own data.
Microsoft Copilot Studio is an add-on to the Copilot experience that lets you connect to your company’s data sources, define conversation logic, built, manage and deploy the agent where employees work.
Copilot Studio makes it accessible even for non-developers to bring AI into everyday work. This guide walks you through every step to build a simple HR Onboarding pilot agent in the Copilot Studio environment.
2. What Are Copilot Agents?
Microsoft Copilot agents are AI assistants embedded inside Microsoft 365 that automate tasks, answer user questions, and surface information from your data. They can appear in Copilot Chat, Teams, SharePoint, or other M365 apps.
Custom agents can be built in two different tools, and Microsoft’s guidance is to choose the one that matches your audience and complexity:
- Agent Builder in Microsoft 365 Copilot: a lightweight, in-context builder that lives inside the Microsoft 365 Copilot app. Best for individuals or small teams who want a Q&A bot grounded on existing Microsoft 365 content (SharePoint files, emails, Teams chats) with no code. Managed through the Microsoft 365 admin centre.
- Copilot Studio: a full standalone web portal for makers and developers. Best for department- or organisation-wide agents that need multi-step workflows, custom connectors, external data sources, advanced AI models, autonomous triggers, Application Lifecycle Management (ALM), and role-based access. Managed through the Power Platform admin canter. This is the tool used throughout this guide.
In either tool, you create custom agents by describing what you want them to do; the system then generates a starting prompt, topics, and knowledge sources. Custom agents have defined scopes and (in Copilot Studio) can integrate external workflows or specialised connectors.
If you start in Agent Builder and later outgrow it, Microsoft supports copying the agent into Copilot Studio so you don’t have to rebuild from scratch.
3. Prerequisites (Before You Start)
Before launching Copilot Studio, confirm the following are in place:
- Microsoft 365 tenant with Copilot enabled.
- Copilot Studio licence. Each maker needs a user licence; the organisation needs the tenant licence.
- Power Platform environment with Dataverse. Copilot Studio stores your agent and uploads knowledge files inside Dataverse in this environment.
- Well-defined knowledge sources. SharePoint sites, uploaded documents (PDF, Word, etc.), Dataverse tables, or connectors such as ServiceNow, Salesforce, Dynamics 365, or Azure SQL.
- A mapped business workflow. Know what task you are automating, who the user is, and what data and actions are required.
4. Identify the Business Workflow
Start with three questions: What task are we automating? Who is the user? What data and actions are needed?
Good workflows are repetitive and decision driven. Some standard examples include:
- HR onboarding: an agent that personalises welcome materials and answers new hire questions (For our worked example, the chosen workflow is: “Help new hires by answering questions about onboarding, company policies, and procedures.”).
- IT helpdesk: an agent that answers policy questions, checks ticket status, and escalates to a human when needed.
- Employee self-service: an agent that handles leave balance lookups and benefits questions, handing off to specialist agents (e.g. Workday) when required.
5. Designing the Agent
With the workflow defined, design the agent’s capabilities and limits before building.
5.1 Purpose, Inputs, and Outputs
Write a clear description of the agent’s job. For our HR Onboarding Assistant:
- Purpose: Answer new hire questions about onboarding, company policies, and procedures.
- Inputs: Natural language questions from new employees; uploaded policy documents; SharePoint onboarding content.
- Outputs: Grounded answers citing internal sources; escalation to HR when out of scope.
5.2 Topics and Triggers
A topic is a conversation path triggered by specific phrases or by the agent itself. When Copilot Studio provisions the HR Onboarding Assistant it automatically creates topics. The four topics that ship with the agent are:
- Greeting: triggered when the user says, “Good afternoon”, “Good morning”, “Hello”, “Hey”, or “Hi”. Responds: “Hello, how can I help you today?”
- Goodbye: triggered when the user signals end of conversation.
- Thank you: triggered by acknowledgements.
- Start Over: resets the conversation context.
On top of these defaults, we will add custom topics specific to onboarding (policy lookup, escalation, etc.).
5.3 Knowledge Sources
Decide upfront which sources will ground the agent. For our HR Onboarding Assistant, we use two sources:
- Uploaded PDF: Stored in Dataverse.
- A SharePoint site: Built from the “New employee onboarding” template.
5.4 Instructions
Write a system prompt that defines the agent’s role, tone, and “must not do” rules. Our agent’s starting instructions (auto-generated then refined):
❐ Purpose
The purpose of this agent is to assist new employees during the onboarding process by answering their questions about company policies, benefits, procedures, and other relevant topics.
❐ General Guidelines
Respond in a friendly, professional, and supportive tone.
Provide accurate and concise answers based on company policies and onboarding materials.
If unsure about an answer, guide the user to the appropriate HR contact or resource.
Do not share confidential or sensitive information beyond what is allowed for new hires.
❐ Skills
Access and interpret company onboarding materials and HR policies. Explain benefits, leave policies, and compliance requirements clearly. Provide step-by-step guidance for common onboarding tasks.
❐ Step-by-Step Instructions
- Understand the Question: Read the user’s query carefully. Identify the topic (e.g., benefits, payroll, compliance, IT setup).
- Search Knowledge Sources: Use internal knowledge sources such as onboarding guides, HR policies, and benefits documentation.
- Provide an Answer: Summarize the relevant information clearly. Include links to official documents or portals when available.
- Offer Additional Help: Ask if the user needs further clarification or assistance. Provide HR contact details if the question cannot be fully resolved.
❐ Error Handling
If knowledge sources are unavailable, inform the user and suggest contacting HR directly. If the question is outside the scope of onboarding, politely redirect the user to the appropriate department.
❐ Interaction Examples
User: How do I enrol in health benefits?
Agent: You can enrol in health benefits through the Employee Portal under the Benefits section. The enrolment period is within 30 days of your start date. Would you like me to share the link?
User: Who do I contact for IT setup?
Agent: Please contact the IT Helpdesk at [email/phone]. They will assist you with your computer and account setup.
❐ Follow-up and Closing
Always confirm if the user needs more help. End conversations with a positive and supportive message, such as: “Welcome aboard! Let me know if you have any other questions.”
6. Building the Agent in Copilot Studio
Follow these steps in the Copilot Studio portal:
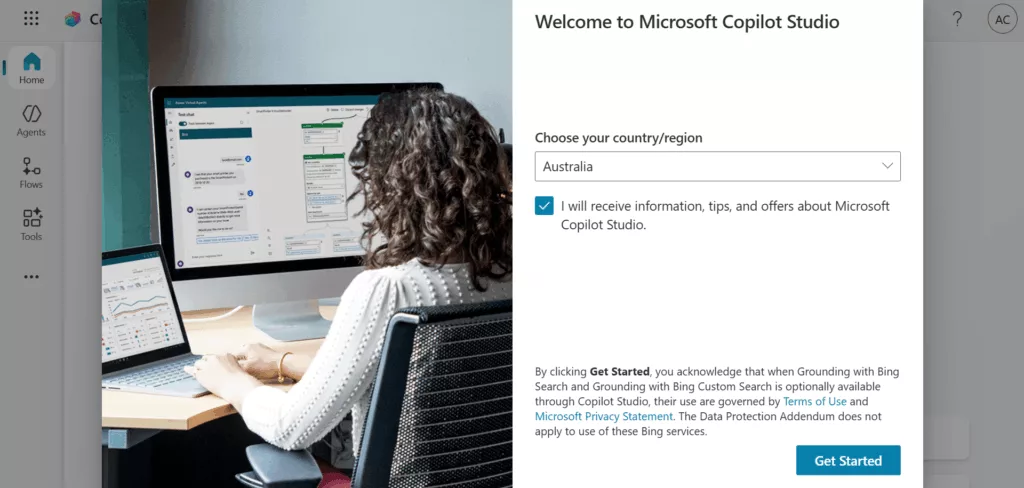
[ Step 1 ] : Sign in and complete first-run setup
Open https://copilotstudio.microsoft.com and sign in with your work account. On first sign-in, Copilot Studio shows a one-time welcome dialog asking you to choose your country/region and accept the terms. For this build we selected Australia and kept the “I will receive information, tips, and offers about Microsoft Copilot Studio” box ticked, then clicked Get Started.
We also offer a structured training course to master Copilot. The course covers practical skills, complete with examples and hands-on labs.
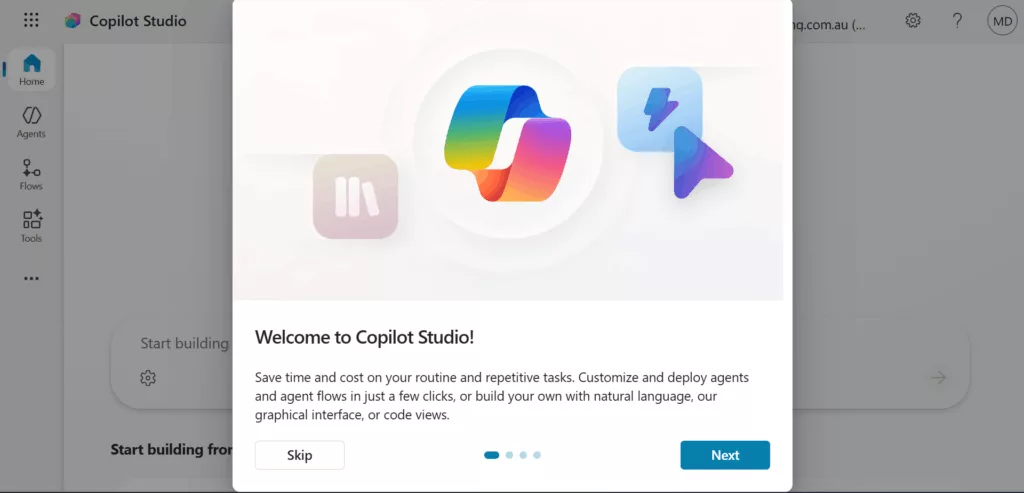
[ Step 2 ] : The Welcome
A short tour explains that Copilot Studio lets you “save time and cost on routine tasks” and that you can build agents using natural language, a graphical canvas, or code views. Click through the slide tour or skip.
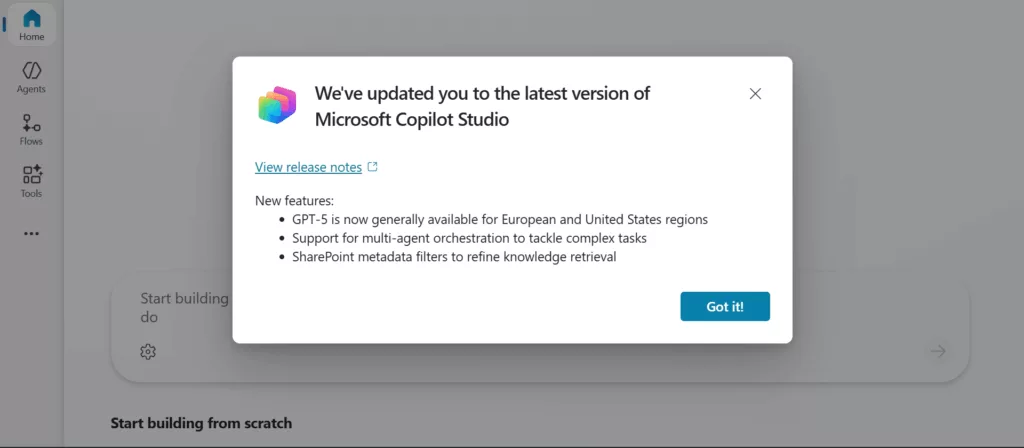
[ Step 3 ] : Check for product updates
Copilot Studio occasionally surfaces a “We’ve updated you to the latest version” dialog. Click Got it! to dismiss the dialog.
[ Step 4 ] : Choose what to build: Agent or Workflow
The Home page asks, “What would you like to build?” with two toggles: Agent and Workflow. Leave Agent selected (the default).
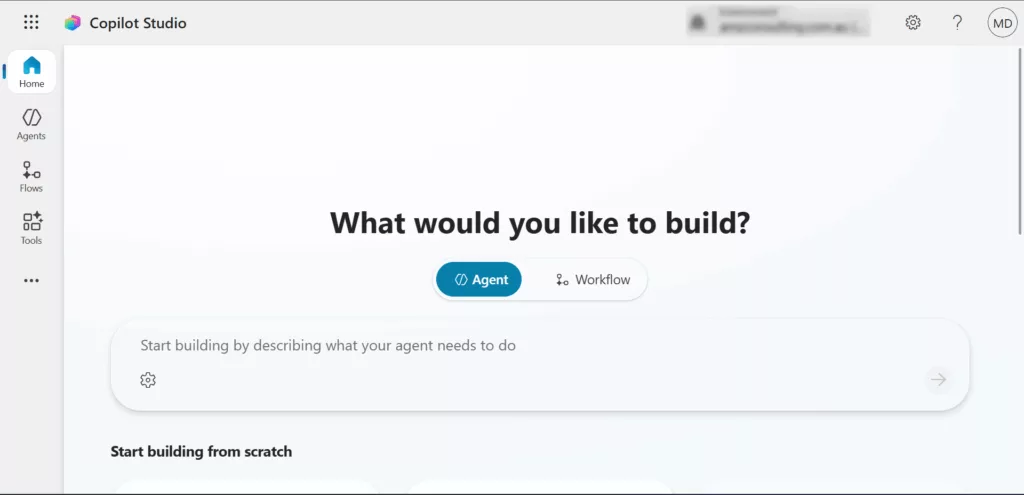
[ Step 5 ] : Describe the agent in natural language
In the prompt box “Start building by describing what your agent needs to do”, type a single-sentence description. For our build we entered:
Description entered:
HR onboarding assistant that answers new hire questions
Then click the blue arrow on the right to submit.
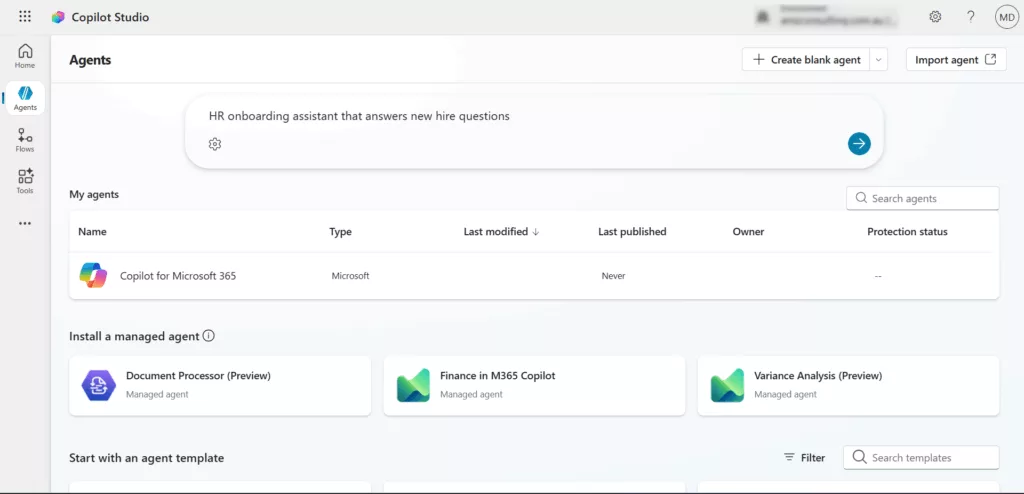
Before you add your agent, will see the system entry “Copilot for Microsoft 365” listed as my agents, plus any managed agents available for installation in your tenant like Document Processor (Preview), Finance in M365 Copilot, and Variance Analysis (Preview). Below that, an Agent-template gallery offers starters such as Website Q&A, Voice, Safe Travels, and Financial Insights.
[ Step 6 ] : Review the auto-generated agent
Copilot Studio provisions the agent and shows the green banner “Your agent has been provisioned.” The Overview tab is populated automatically with:
- Name: HR Onboarding Assistant
- Description: “Helps new hires by answering questions about onboarding, company policies, and procedures.”
- Model: Claude Sonnet 4.6.
- Instructions: An auto-generated Purpose + General Guidelines block that you can edit.
The top navigation shows the available tabs: Overview, Knowledge, Tools, Agents, Topics, Activity, +3. The right-hand Test panel opens automatically with the agent’s greeting: “Hello, I’m an HR Onboarding Assistant. How
can I help?”
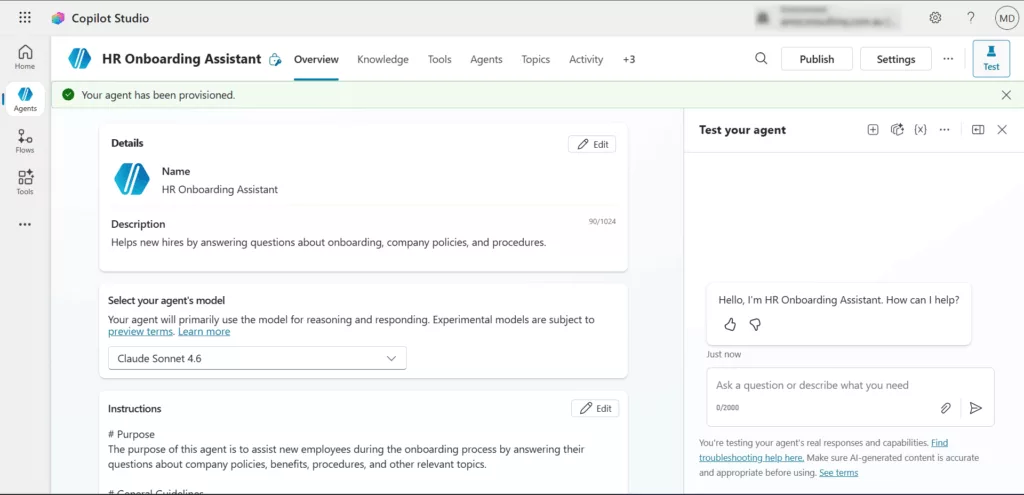
Claude Sonnet 4.6 is one of the foundation models available in Copilot Studio. You can change models from the “Select your agent model” dropdown on the Overview tab.
[ Step 7 ] : Connecting Knowledge & Data
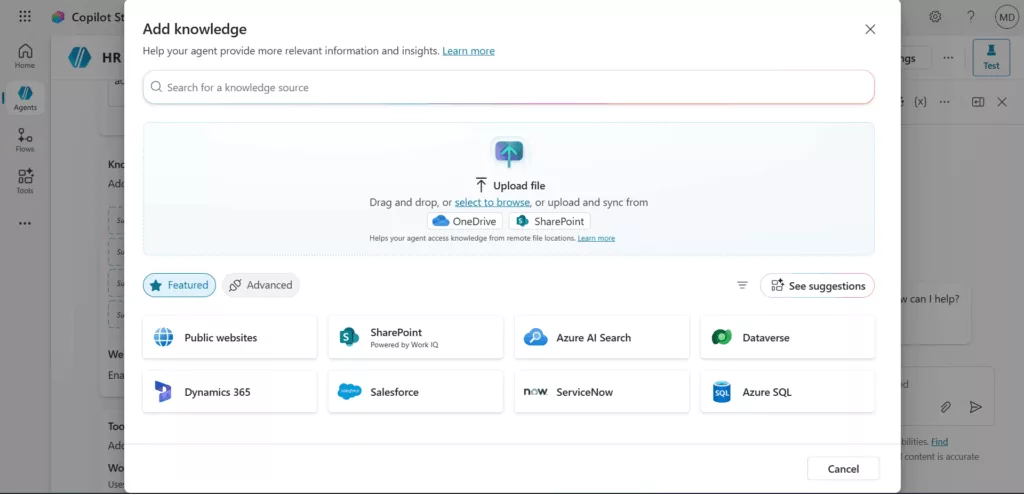
On the agent’s Knowledge tab, click “+ Add knowledge”. The Add knowledge dialog opens with the following options.
▪ Available Knowledge Sources
The dialog shows two upload paths at the top:
- Upload files by drag and drop or click “select to browse”.
- Upload and sync from OneDrive or SharePoint to keeps the agent’s knowledge synced with remote file locations.
Below that, a Featured row lists the eight most common connector types:
| Source | When to use it |
|---|---|
| Public websites | Ground answers on one or more public URLs (e.g. your company website). |
| SharePoint (Powered by Work IQ) | Connect a SharePoint site, library, or folder (strongest fit for internal docs and pages). |
| Azure AI Search | Use an existing Azure AI Search index for enterprise-scale RAG. |
| Dataverse | Query Dataverse tables (useful for structured business records). |
| Dynamics 365 | Pull data from CRM/ERP modules (sales, customer service, etc.). |
| Salesforce | Read records from a connected Salesforce org. |
| ServiceNow | Ground on knowledge articles or incidents from ServiceNow. |
| Azure SQL | Query a relational database directly. |
Click the Advanced toggle to reveal additional connector categories or click See suggestions to let Copilot Studio recommend sources based on your description.
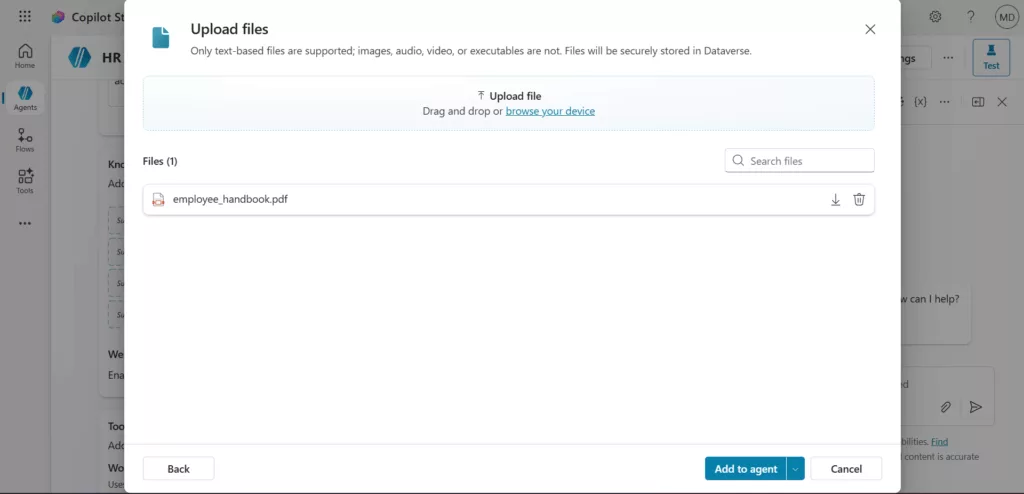
▪ Uploading a File
For our HR agent, we uploaded a single PDF. Click select to browse, choose the file, and the Upload files dialog appears listing your file. Click Add to agent.
▪ Creating the SharePoint Knowledge Source
Because Copilot Studio can sync directly from SharePoint, we created a dedicated onboarding site. From the SharePoint home page, click “+ Create site”, then select “communication site”. The template gallery offers pre-built communication-site designs:
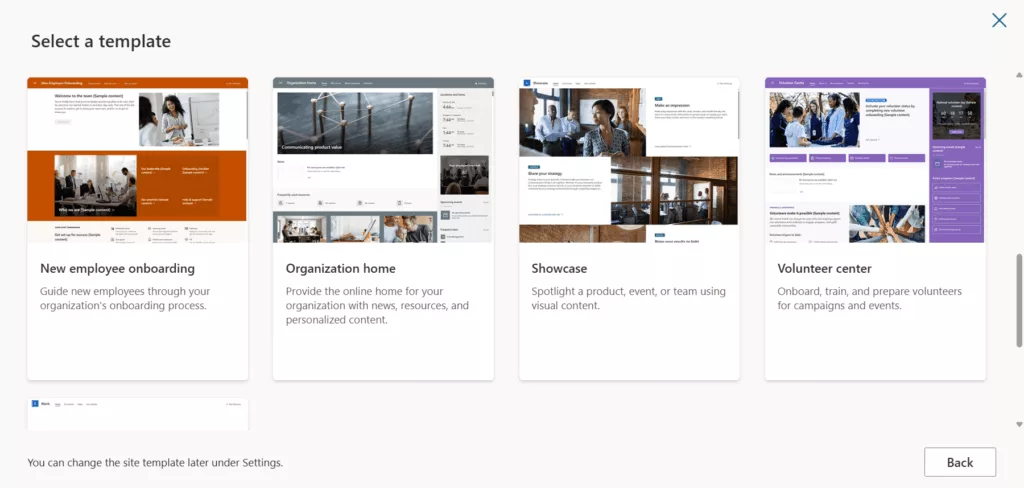
Click the New employee onboarding card to open the preview. Click Use template.
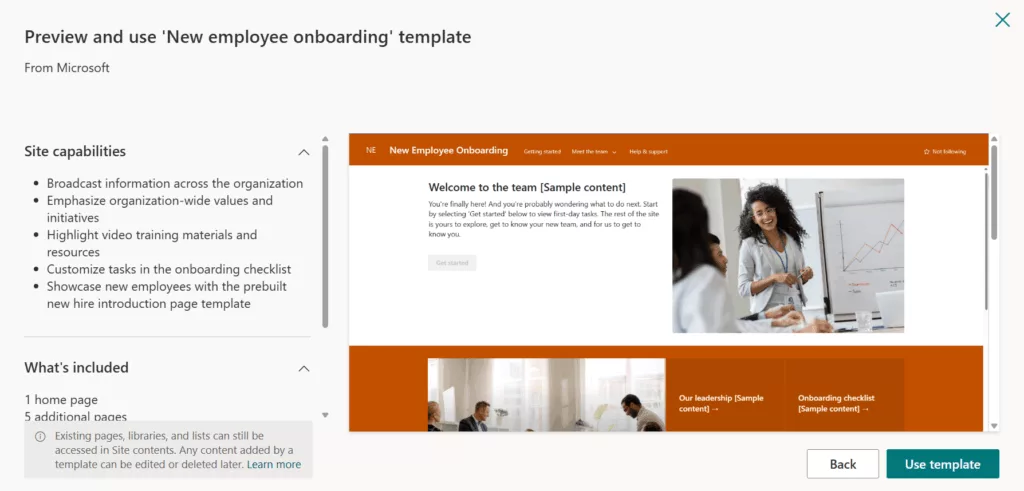
Fill in the site identity: Site name, Site description and Site address. On the next screen, choose the default site language (English), then click Create site. The status indicator shows “Creating site” while SharePoint provisions the pages.
Back in Copilot Studio, return to the Add knowledge dialog, click SharePoint (Powered by Work IQ), paste the new site URL, and add it to the agent. The agent is now grounded on both the PDF and the SharePoint site.
[ Step 8 ] : Adding Tools and Actions
Work IQ “uses your work activity to provide more relevant responses”. It is Disabled by default. When enabled, the agent draws on signals from connected Microsoft 365 apps (Copilot, Outlook, SharePoint, OneDrive, Teams, Word, Excel) to personalise answers.
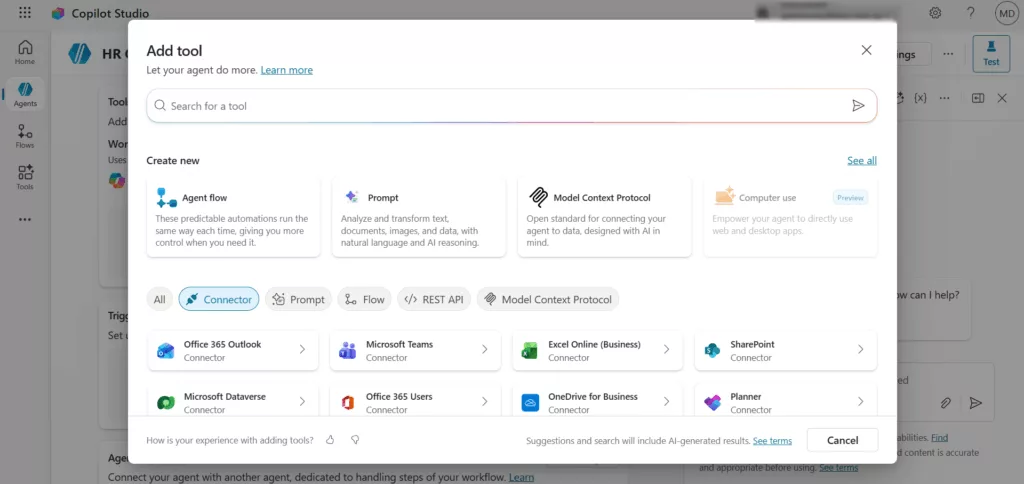
In the Tools section click + Add tool. The Add tool dialog has a search box at the top, “Create new” cards, and a scrollable connector gallery.
[ Step 9 ] : Add Triggers
Triggers are events that cause the agent to activate by itself. Click + Add trigger and choose an event source. Triggers turn the agent from a passive responder into an automated worker. For the HR Onboarding Assistant, a natural future trigger is “When a new employee is added to Microsoft Entra ID, run the welcome workflow.”
[ Step 10 ] : Agents (multi-agent orchestration)
This section lets you connect your agent with another agent, dedicated to handling specific steps of your workflow. Click + Add agent to wire up a child agent that this one can hand off to. This is the multi-agent orchestration feature highlighted in the recent release notes. Typical pattern for the HR agent: hand off to a dedicated Payroll Agent for compensation questions.
[ Step 11 ] : Configuring Topics
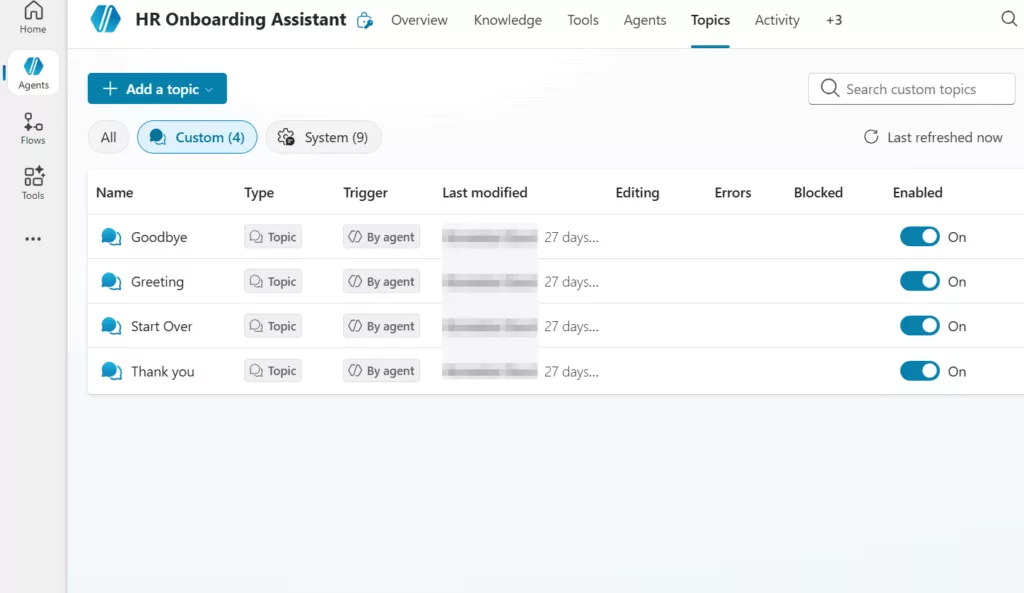
The Topics tab is where you control the conversation paths the agent recognises. It has three filters at the top: All, Custom and System. Each row in the list shows Name, Type, Trigger, Last modified, Editing, Errors, Blocked, and Enabled.
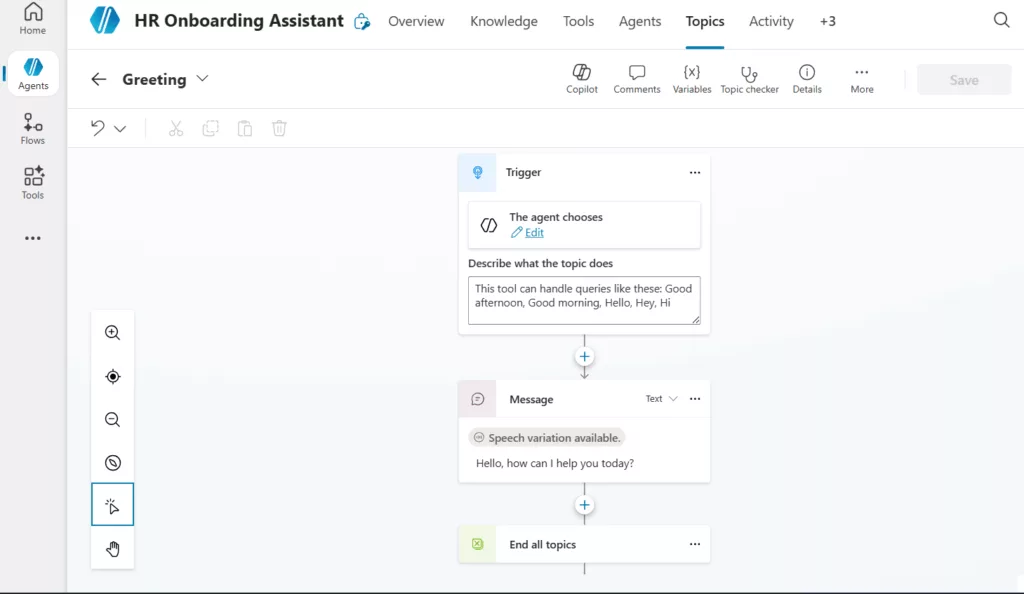
Click a topic name to open the visual editor. The editor toolbar (top) provides: Copilot, Comments, Variables, Topic checker, Details, More, and Save. A vertical canvas-controls strip on the left lets you zoom, fit-to-view, navigate, select, and pan.
The Greeting topic graph has exactly three nodes wired top-to-bottom:
- Trigger: “This tool can handle queries like these: Good afternoon, Good morning, Hello, Hey, Hi”.
- Message: “Hello, how can I help you today?” with a Speech variation indicating an alternative voice-channel response.
- End all topics closes the topic so control returns to the main reasoning loop.
To add a step between any two nodes, hover over the connector and click the “+” icon. Available node types include send a message, ask a question, add a condition, call an action (tool), Manage variables, and End topic / End all topics etc.
[ Step 12 ] : Suggested prompts
The Suggested prompts panel lets you “suggest ways of starting conversations for Teams and Microsoft 365 channels.” Click + Add suggested prompts and provide 3–6 short examples (e.g. “Where do I submit my tax form?”, “How much annual leave do I have?”, “Who is my HR business partner?”). Well-chosen prompts dramatically improve first-use adoption.
[ Step 13 ] : Testing and Refinement and Deploying the Agent
The Test your agent panel is always visible on the right side of the editor. Type realistic questions, watch the response, then refine (“ask, observe, refine, repeat”).
When testing is complete, click Publish in the top-right of the editor. After publishing, use the Activity tab to monitor real conversations, success/failure rates, and which knowledge sources were used. Iterate weekly.
7. Best Practices
- Keep scope focused. Give each agent one clear job. Build a separate agent for HR and another for IT; don’t try to combine them.
- Use high-quality, curated data. Agents will faithfully repeat whatever you give them. Clean and approve documents before connecting.
- Write explicit instructions. State the boundaries (“do not…”), the tone, and the escalation path.
- Iterate weekly. Review Activity logs, add missing topics, retire stale content.
- Govern access. Apply least-privilege on knowledge sources. Use SharePoint metadata filters (new in this release) to restrict what the agent can return per user.
If Your Team Already Has Copilot. Now is the Time to Teach Them to Use It Properly. Enrol Now for corporate training delivered onsite or online, Australia-wide.