
With the current buzz in 3D it was a sure thing that Adobe Illustrator would catch on and introduce tools, which enabled users to be able to create 3 dimensional shapes.
Steps to Create 3 Dimensional Shapes
STEP 1:
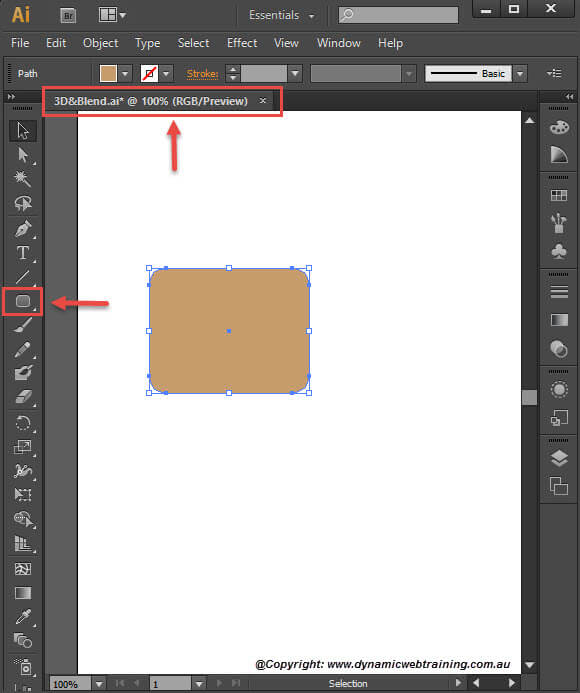
Make sure to start with having an Adobe Illustrator document opened. Within that document with the use of the Shape Tool draw a 2D shape.
STEP 2:
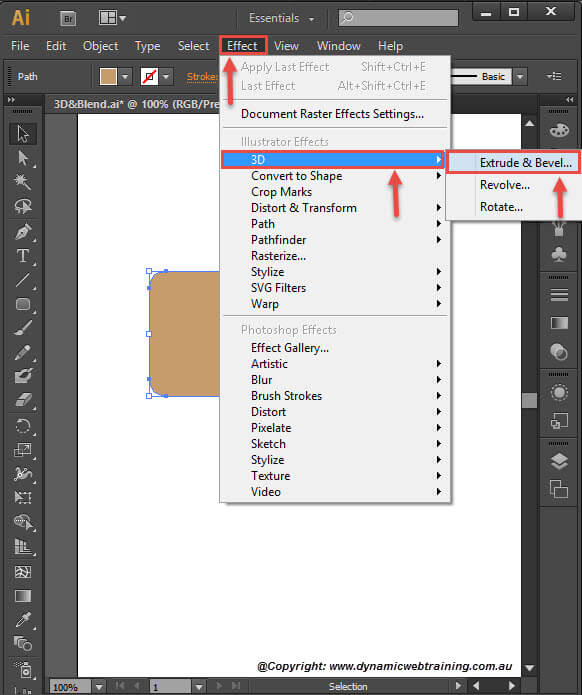
It is time to add the 3D touch to your shape and you can do so by going into the Menu Bar selecting Effect and from the drop down selecting 3D Extrude & Bevel.
STEP 3:
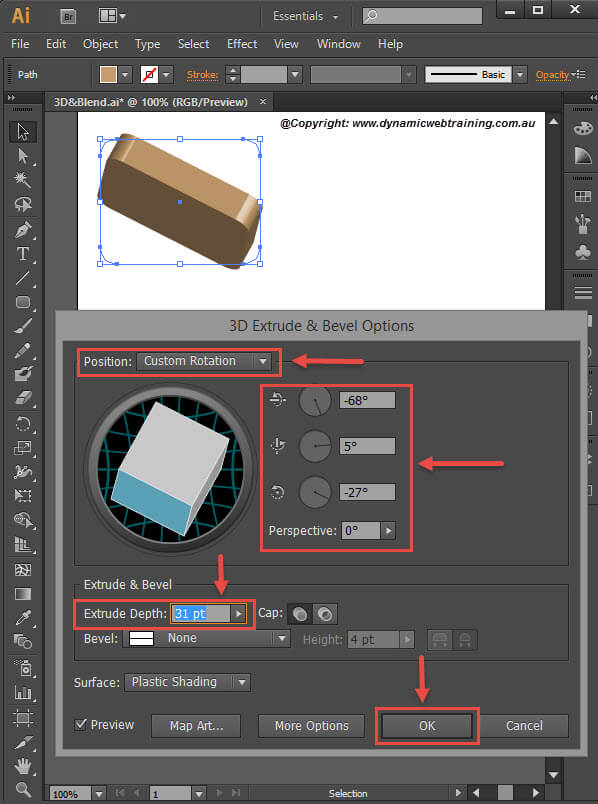
The 3D Extrude & Bevel configuration window will now open up. At the bottom left corner make sure to select preview so that you are able to observe the changes you make. You can edit the options as you like or follow on from what I have done.
Position: Custom Rotation
Specify Rotation around the X axis: -18°
Specify Rotation around the Y axis: -26°
Specify Rotation around the Z axis: 8°
Extrude Depth: 31 pt
Position: Sets how the object is rotated and the perspective from which you view it.
Extrude and Bevel: Regulates the object’s depth and the extent of any bevel added to or cut from it.
Once done, click OK.
Well Done! Now you know how to create 3D shapes using Adobe Illustrator.