Power BI apps are a simple way to package and share your Power BI content (like dashboards and reports) with others. Imagine you’re an HR analyst who built multiple reports showing employee hiring trends and history. You might want to share these reports with your team or management in a convenient, read-only format. This is exactly what Power BI apps are for: they allow easy sharing of curated insights, providing your colleagues with cleaner, focused access to the data they need. Benefits include one-stop access to multiple reports, automatic updates (no need to email out new files), and the ability to target content to specific audiences.
In Power BI context, an “app” doesn’t mean a mobile or desktop application – it’s a packaged set of dashboards and reports published via the Power BI Service.
In this guide, we’ll walk you through creating your first Power BI app step by step.
Understanding Power BI Apps
A Power BI app is essentially a bundled collection of one or more dashboards and reports, combined into a single, shareable entity. You create apps from a workspace in the Power BI Service. Think of the workspace as a staging area where you and your team build and organize content. When ready, you publish an app from that workspace to deliver a finished, professional-looking package to end users.
Workspace vs App
A workspace is a collaborative area in Power BI Service where content is published and managed (reports, dashboards, datasets). An app is the read-only, polished product of a workspace, intended for a broader audience. In short, workspaces are for creators; apps are for viewers.
Key benefits of Power BI apps for businesses:
Organized Content: Apps let you group related dashboards and reports together, so users have a one-stop-shop for all relevant information (for example, an “HR Analytics App” might contain multiple HR reports). This organization makes it easier for business users to find insights without navigating multiple links.
Targeted Sharing: Apps support selective access. You can publish an app to your entire organization or only specific people or security groups. You can even create multiple audiences within one app to show different content to different departments – all from the same workspace. This ensures each user group sees only the data relevant to them in a secure way.
Cleaner User Experience: When users access an app, they see a streamlined interface with your chosen logo, colours, and descriptions. It feels like a finished product. They won’t see the editing menus or clutter of the development workspace – just the reports and dashboards you shared. This makes it less overwhelming for non-technical viewers and encourages adoption.
Prerequisites
Before you begin creating an app in Power BI Service, make sure you have the following in place:
Power BI Service access: You need an account to sign in to the Power BI Service (the cloud interface at app.powerbi.com). Log in to the web service with your Microsoft work account.
Power BI Pro or Premium Per User (PPU) license: To create or publish apps, you must have a Pro or PPU license. Users who will view the app also generally need Pro licenses, unless your organization has Power BI Premium capacity which allows free-user access to apps. If you don’t have a Pro license, you can sign up for a free trial to follow along.
App workspace: Only workspaces other than ‘My Workspace’ can publish apps. You should have permission to create a new workspace in your Power BI tenant. We will cover creating one in the steps below.
Sample content to publish: For this tutorial, we’ll use the Employee Hiring and History sample – a ready-made dashboard/report about employee hiring trends. This sample is available in the Power BI Service’s Learning Center. (If you already have your own report, you which want to share, that works too!)
Step-by-Step Guide to Creating Your Power BI App
Now let’s dive into the process. We’ll go through the steps of creating an app using the Employee Hiring and History sample scenario.
Accessing the sample dashboard
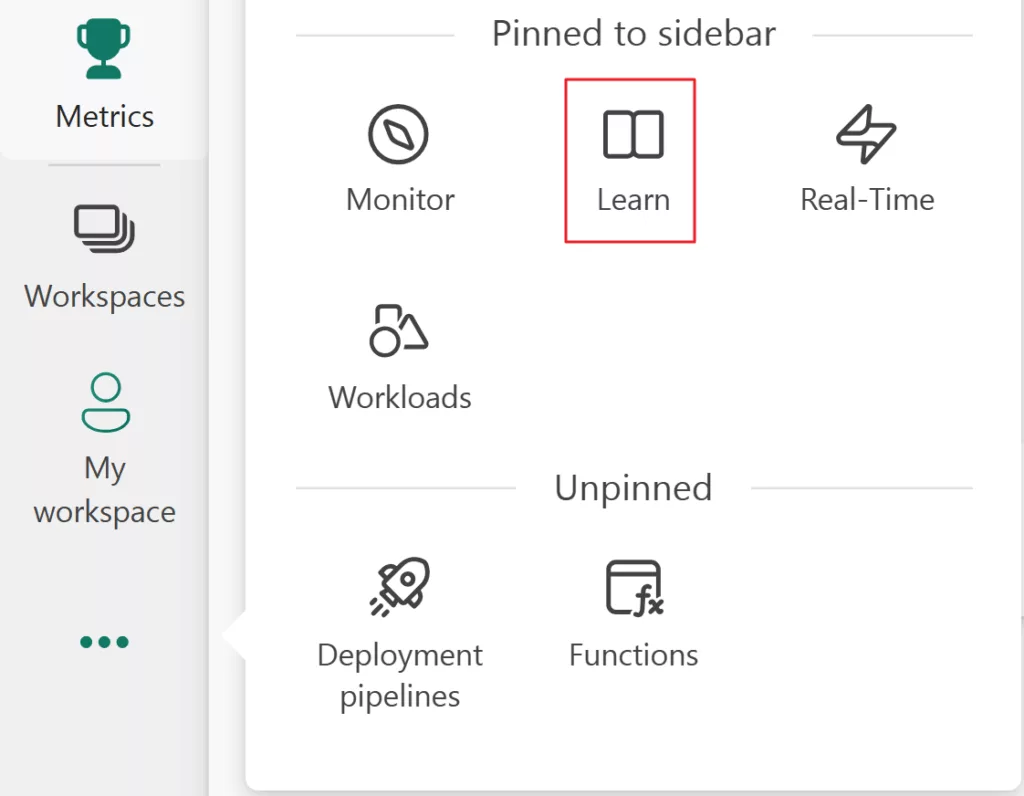
First, let’s get the sample data and dashboard we want to share:Open the Power BI Service and find the sample: After logging in to Power BI Service, look at the left-hand navigation pane. Click on Learn.
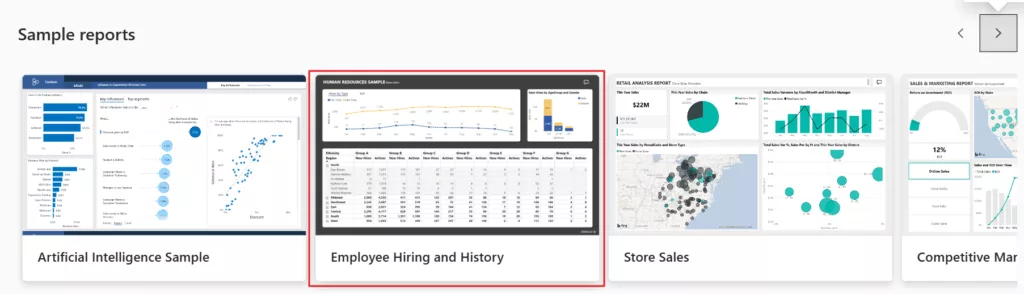
In the Learning centre, scroll through the Sample reports section until you find Employee Hiring and History – the human resources sample. Click on it.
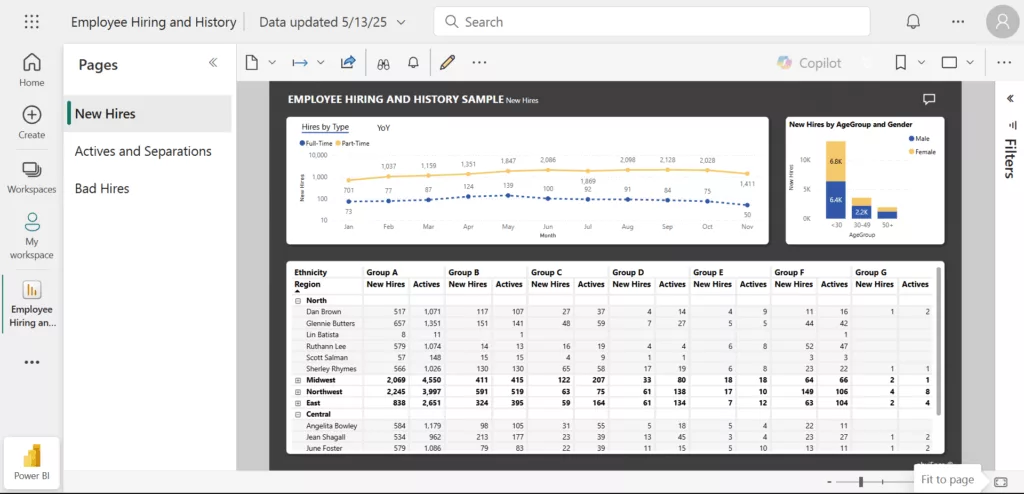
The sample report will open in “Reading view” (view-only mode) for you to explore. At this point, behind the scenes Power BI adds a report (and its dataset) to your My Workspace by default. This sample includes data on new hires, active employees, and those who left, presented in interactive charts.
View the dashboard/report: Take a moment to familiarize yourself with the visuals. You might see charts for New Hires by month, demographics of hires, and possibly turnover metrics. This is the content we’ll package into an app.
If you were doing this with your own data, you would first create a report or dashboard in Power BI (using Power BI Desktop) before proceeding to app creation. The good news is that with the sample, you already have a finished report to work with.
Creating a workspace: Next, you need to create a workspace to house the content that will go into your app. Remember, you cannot publish an app from My Workspace (your personal workspace); it must be a dedicated workspace that can be shared.
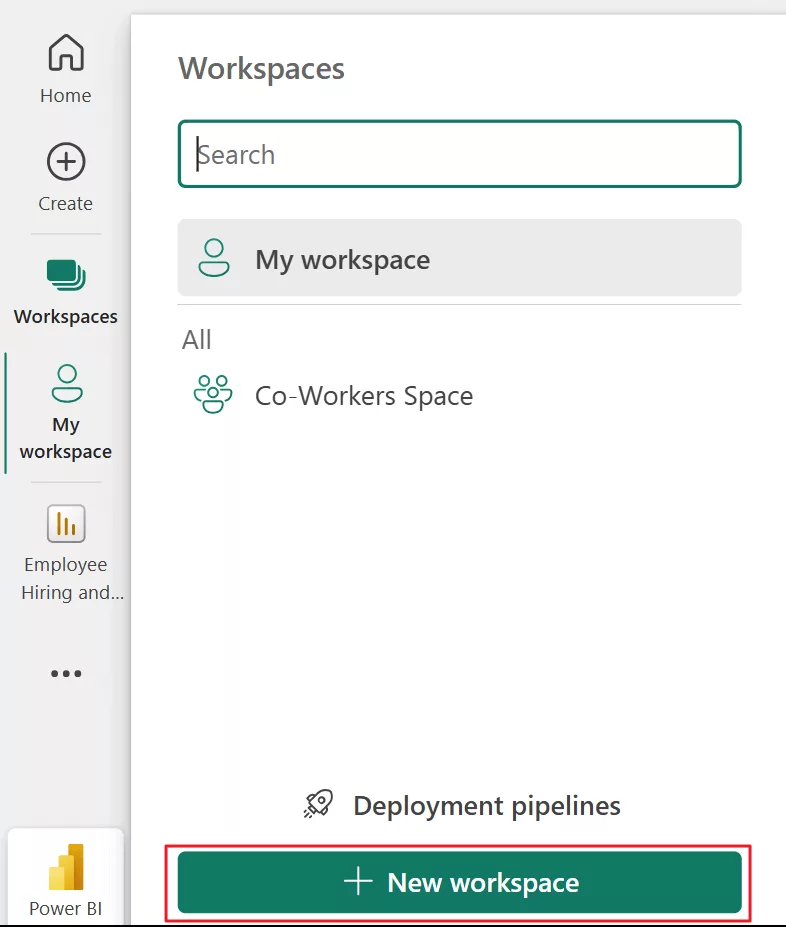
To create a new workspace: In the Power BI Service portal, click on Workspaces in the left navigation menu. This will show a dropdown of workspaces you have. At the bottom of that list, click + New workspace.
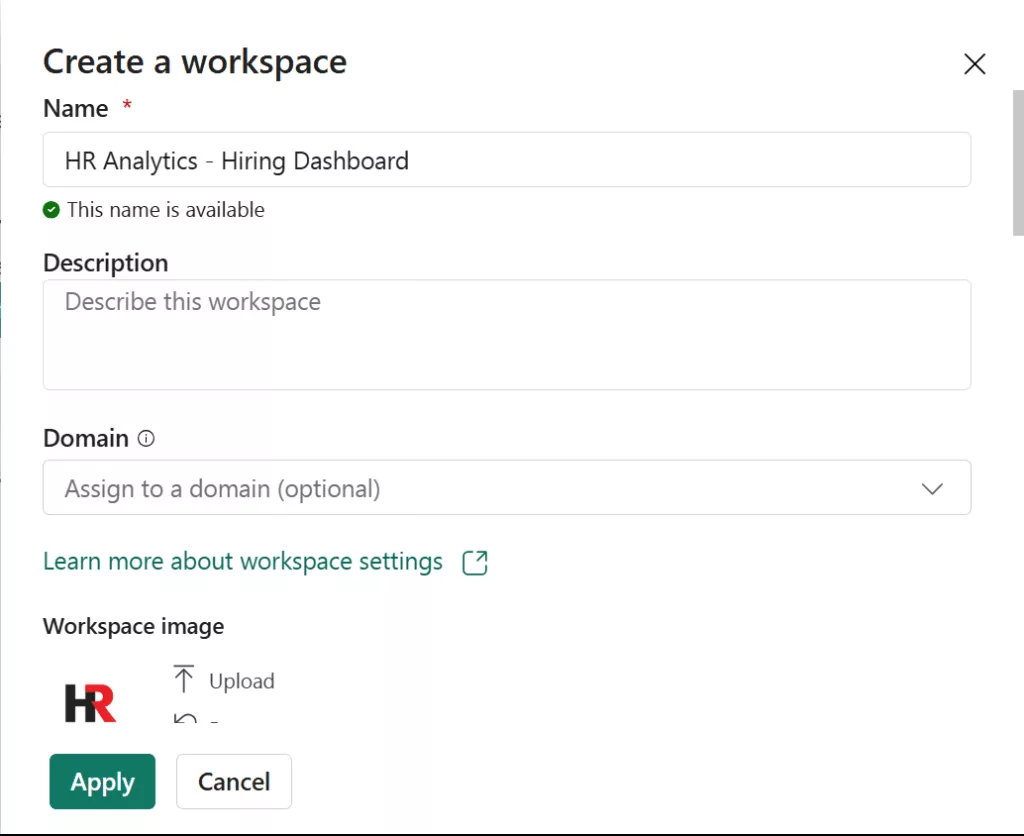
A form titled Create a workspace will appear. Enter a Name for your workspace. For example, “HR Analytics – Hiring Dashboard” (or any descriptive name you like). Power BI will alert you if the name isn’t unique within your organization.
Note:Add a short Description for the workspace and upload a workspace image (logo) if you have one. These are optional, but the workspace image will also be the default icon for the app, making it look nice and branded.
Leave other Advanced settings at default for now (you don’t need to worry about Domain, contacts, or Premium capacity for this beginner exercise).
Click Apply. Your new workspace will be created and should open automatically. You’ll see an empty content list (since we haven’t added anything yet) and the workspace name at the top.
Now we have a dedicated workspace. Think of this as a folder where you’ll put the employee hiring dashboard and report, and from which you’ll publish the app. By default, you are the workspace admin. You could add colleagues to the workspace with edit or view roles, but for a first app, we’ll assume you’re working solo.
Adding content to the workspace: With your workspace ready, the next step is to add the sample dashboard/report into that workspace. Since we opened the sample in My Workspace, we want to move or copy it into the new workspace so that the app (which will be published from the new workspace) includes this content.
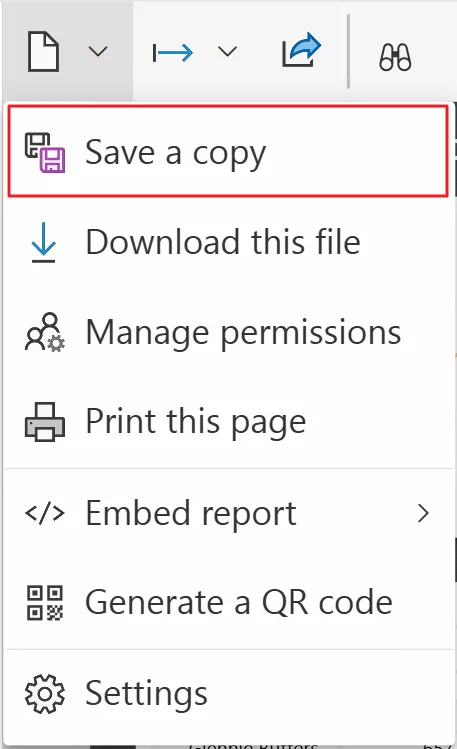
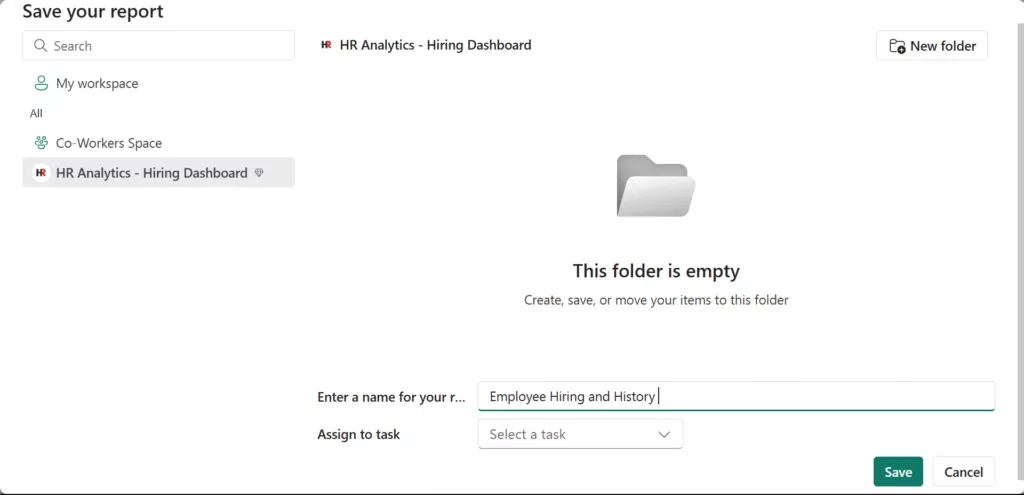
Save a copy of the report to the new workspace: In Power BI Service, open the Employee Hiring and History report (the one you accessed in My Workspace). At the top menu, look for File -> Save a copy.
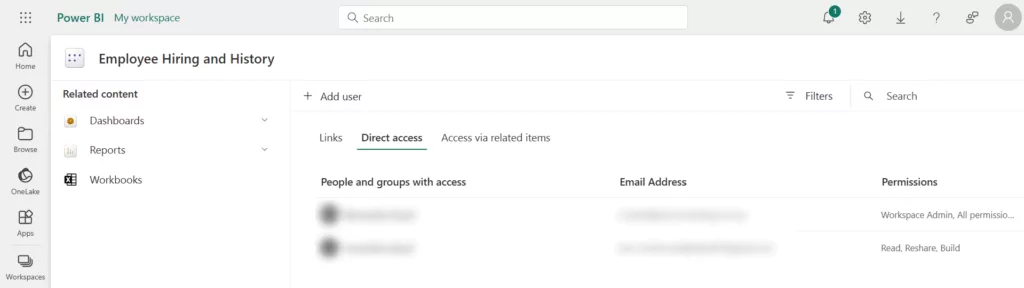
When prompted, choose the new workspace (e.g. HR Analytics – Hiring Dashboard) as the destination for the copy, and give the report a name (you can keep the same name). Clink on save.You should now see the report listed in your new workspace’s content list. Important Note: The dataset does not automatically copy with the report. To fix this: Set permissions on the dataset: Open dataset in the My workspace, click the “…” next to the dataset and select Manage Permissions. Click on the “+Add” option under the direct access tab to add the necessary users or security groups who need access to the dataset. This ensures they can see the report tiles without permission errors.
Create a dashboard in the workspace (Optional): Power BI distinguishes between reports and dashboards. Our sample is currently a report (multiple pages of visuals). If you want an at-a-glance dashboard as part of your app (perhaps as a landing page with key metrics), you can create one by pinning visuals from the report.
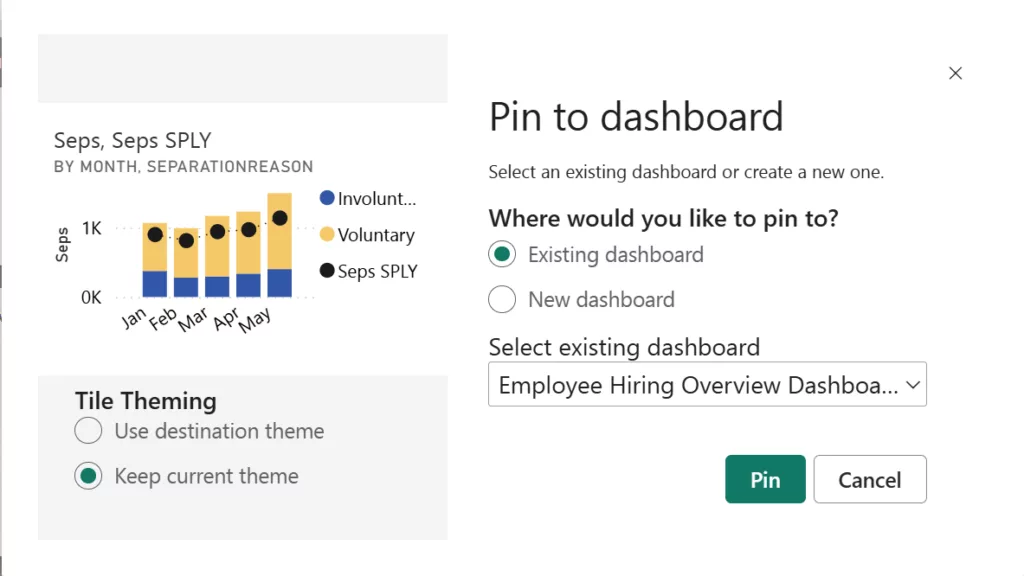
In the new workspace, open the Employee Hiring and History report you just copied. To pin a single visual, first click on edit icon ✏️ then hover on that visual and click the pin icon 📌.
When asked to select a destination, choose new dashboard, and give it a name, e.g. “Employee Hiring Overview Dashboard”. Confirm the pin.
Power BI will create a new dashboard in that workspace with the tile you pinned. You can add more visuals to this dashboard by pinning additional charts. Now your workspace will list a Dashboard (with the name you chose).
After these steps, your workspace contains the content we want to publish at minimum, the Employee Hiring and History report, and optionally an Employee Hiring Overview dashboard that you created from it. This content is our “package” that will go into the app.
Configuring the app (name, logo, audiences): Now comes the exciting part – configuring and creating the app itself. In your workspace, look at the top-right corner. You should see a button that says Create app. Click this button to begin the app creation process.
Setup tab – App details: On the Setup step, fill in the basic details for your app.
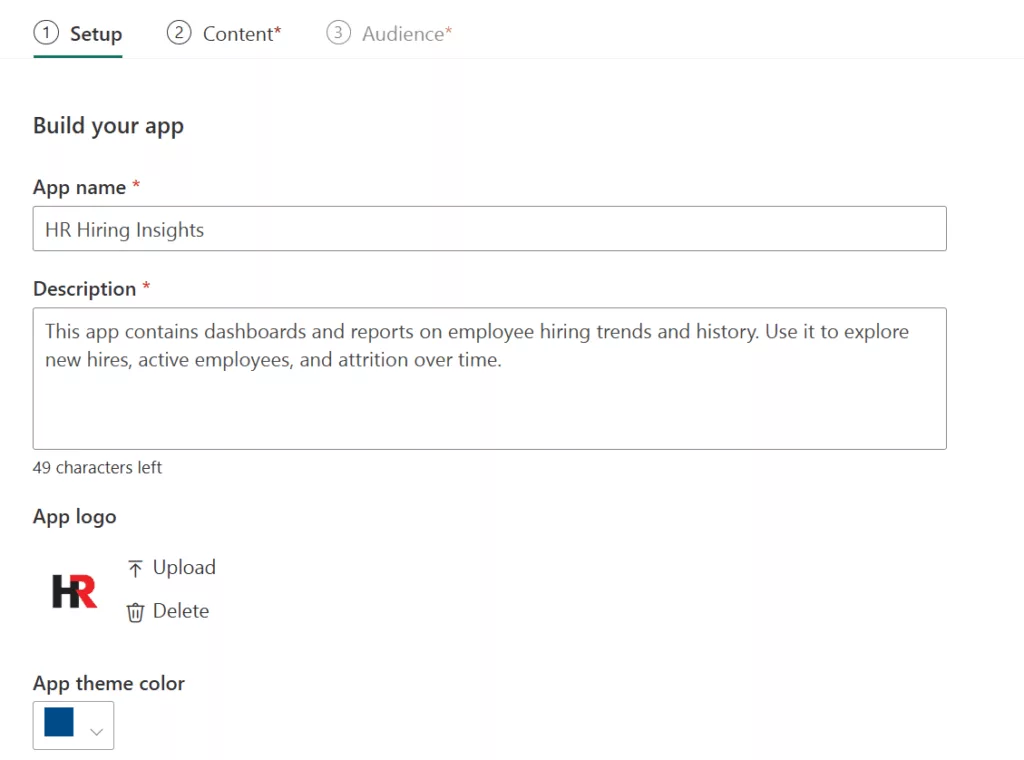
App Name: By default, it may populate with your workspace name, but you can change it. For example, “HR Hiring Insights” or “Employee Hiring Analysis App”. Choose a name that will make sense to your end users.
Description: Write a short friendly description of what’s in the app. For instance: “This app contains dashboards and reports on employee hiring trends and history. Use it to explore new hires, active employees, and attrition over time.” A good description helps users discover the app and know its purpose.
Logo and Theme colour: You can upload a custom logo for your app (perhaps your company’s logo or an HR icon). If you don’t upload one, it might default to the workspace image or a generic icon. You can also pick a theme colour that appears in the app’s header for branding. These branding touches are optional but add a professional feel.
Contact information: Optionally, specify a Support site URL or contact email. This is useful if users have questions; they’ll know who to reach out to. Often, the default is the workspace owner’s email.
(On this Setup screen, there are also some advanced settings you can expand on. For your first app, you can ignore these but just know you could toggle options like allowing users to make copies of reports from the app or allowing access to hidden content. We’ll keep things simple and leave defaults.) Click on Next: Add content.
Content tab – Choose content to include. This is where you select which dashboards and reports (from your workspace) will be part of the app.
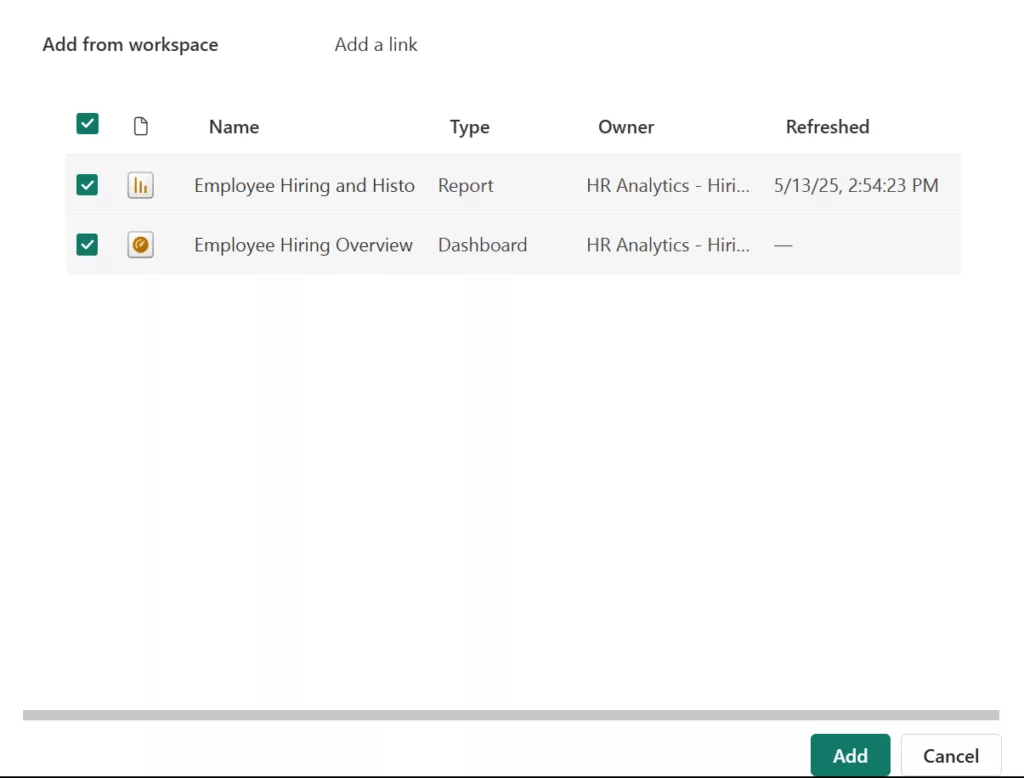
Click Add content. You’ll see a list of all the reports and dashboards in your workspace. For our example, check the box for the Employee Hiring Overview Dashboard (if you created one) and the Employee Hiring and History report, click Add. You can include multiple reports and dashboards here.
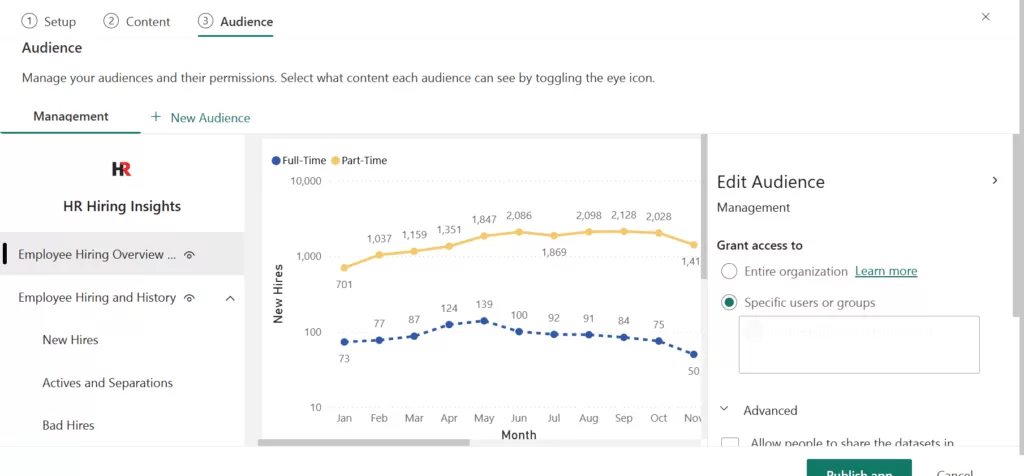
Audience tab – Set access: Click Next to go to Audiences. Here you define who will be able to view the app and configure multiple audiences as well. For your first app, we can keep it simple with a single audience:
You’ll see a default audience (often named the same name as your app). You can rename this audience label if you want (e.g., “All HR Team” or “Management”).
In the content list below, ensure that for this audience all the items you want them to see are visible (there will be eye icons or checkmarks). By default, everything you added is visible to the default audience.
On the right side, the “Grant Access to” specifies who should have access. You can enter individual email addresses, an Office 365 security group or a distribution list if it exists for your intended users. Using groups is a best practice as it’s easier to manage outside of Power BI (office admins can add/remove people in the group as needed).
If your aim is to share with everyone in your organization, you could type “Entire organization”. This option needs to be enabled by the admin.
You can ignore this option to create new audiences for now. (That’s a more advanced scenario where, say, you want a specific “HR Managers” audience that sees additional content in the app that a general “Employees” audience does not. It’s powerful but not needed for this first app.)
Double-check the list of users/groups – these will be the people who can consume your app. They need not to be workspace members; app access can include people who are completely outside the workspace.
Publishing and sharing the appNow that everything is configured, it’s time to publish your app so that your intended audience can start using it. Review your settings, then click the Publish app button. In a moment, you should see a success message that your app is published. Congratulations – your app is now live! 🎉
Get the share link: After publishing, Power BI usually gives you a direct link (URL) to the app. Copy this link – you can share it with your users via email or chat.
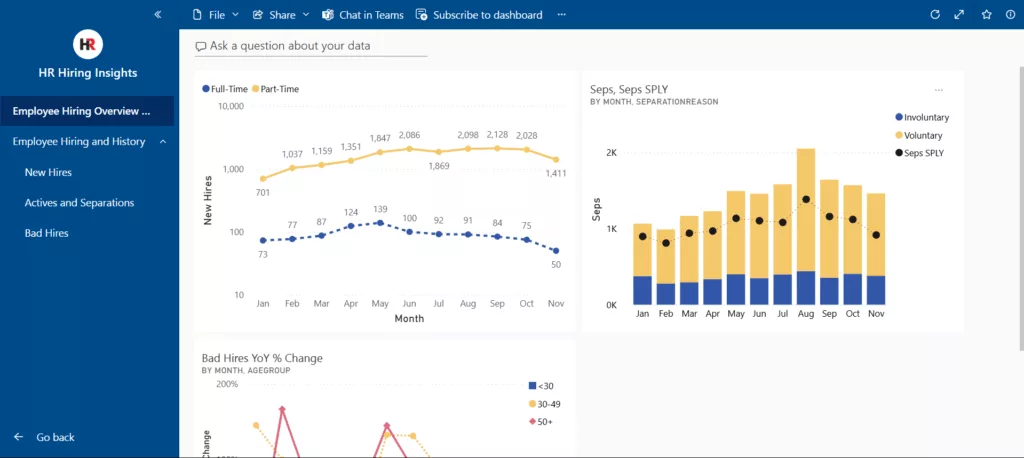
Viewing the appWhen users open the app, they will be able to view the reports configured for their audience segment. For example, they might first see the Employee Hiring Overview Dashboard with high-level metrics and can click through to the Employee Hiring and History report for more details. They can interact with reports (filter, highlight data) but cannot save changes to the app’s version. The experience is clean: they won’t see edit buttons or clutter – just the navigation menu for the app and your content. Your Power BI app is now up and running, providing an easy access to your team.
Conclusion
Creating your first Power BI app is a simple and effective way to organize and share reports and dashboards across your business. We started with a sample HR dashboard, packaged it into an app, and published it for others — turning a set of reports into an easily accessible one-stop resource. By doing so, you’ll benefit from easier sharing, always up-to-date insights in one place, and a customized experience tailored to your audience’s needs.


 When prompted, choose the new workspace (e.g. HR Analytics – Hiring Dashboard) as the destination for the copy, and give the report a name (you can keep the same name). Clink on save.You should now see the report listed in your new workspace’s content list.