
Not many people are aware of the fact that you are able to save an Illustrator document as a Photoshop file and vice versa. Adobe added this feature to able users to seamlessly work in between the two documents, where you can edit text with Illustrator and add depth within the image using Photoshop.
Follow on to learn!
Steps: Saving an Illustrator file
STEP 1:
Start off with having any Illustrator file open.
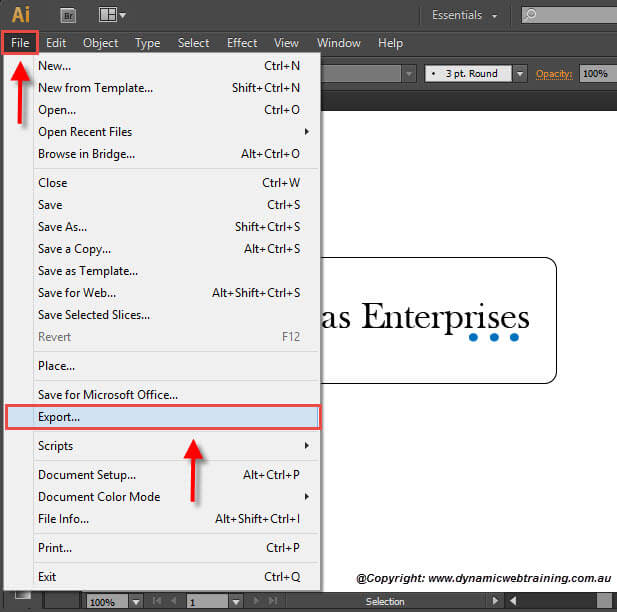
STEP 2:
In the Menu Bar select the File tab and then select the Export option.
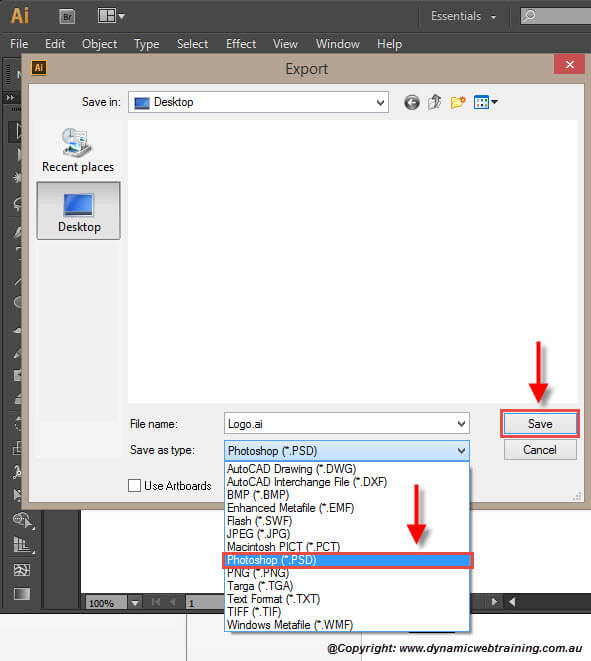
STEP 3:
Once the Export dialog box has opened, roam to where you would like to save the file and what you would like to save the File name as. Then at the bottom select the drop down menu next to the Save as Type section and click on the ‘Photoshop (*PSD)’ file type and click Save.
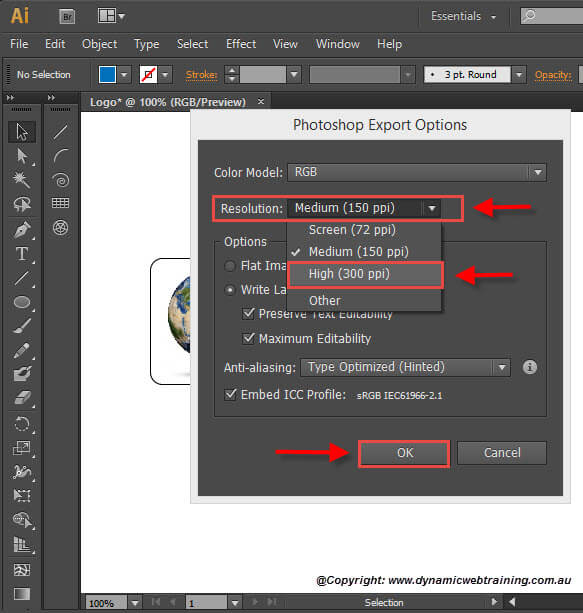
STEP 4:
As soon as you save the file the ‘Photoshop Export Options’ dialog box will open. Go to the Resolution criteria and from the drop down select the High (300 ppi) option. Once done, click Ok.
STEP 5:
You now have created a Photoshop (*PSD) version of your Illustrator document. Once you open the Photoshop file you should see all the layers on the right side.
Happy Editing!
