Masking can be used to hide portions of one layer and reveal the layers below. This is one of the many reasons why masking is considered a valuable composition technique for combining numerous photos into a single image.
Follow on to learn how!
Steps to use Masking
STEP 1:
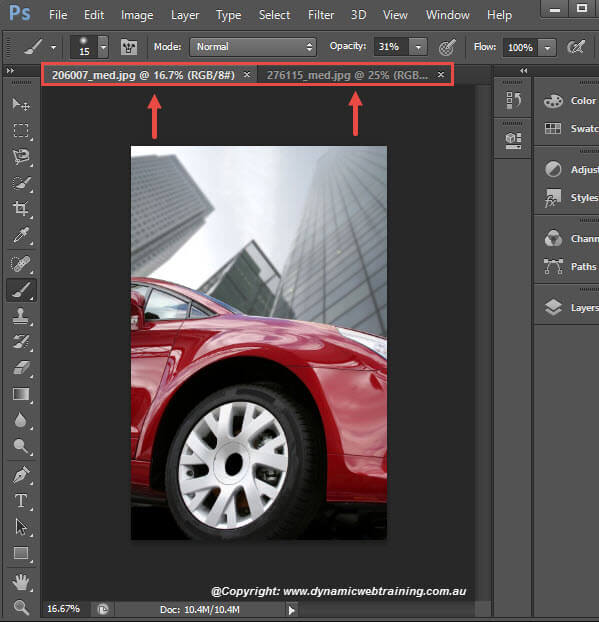
Have the images you would like to compose open. You are more than welcome to combine as many pictures as you like, however for this blog we will use two images.
STEP 2:
With the use of the Move Tool drag and drop the second image into the first one (the image which will be the top layer).
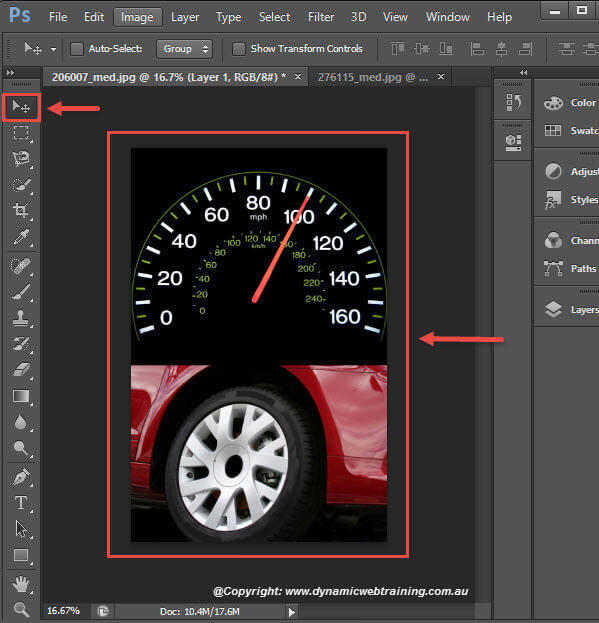
STEP 3:
Now head over to the Layers panel, which should be at the right side or the middle of your window. Double click on the Pad Lock (indicates layer is partially locked) if it is next to either of the layers, this will unlock the layer. This Pad Lock ensures that no one is able to alter and modify the image.
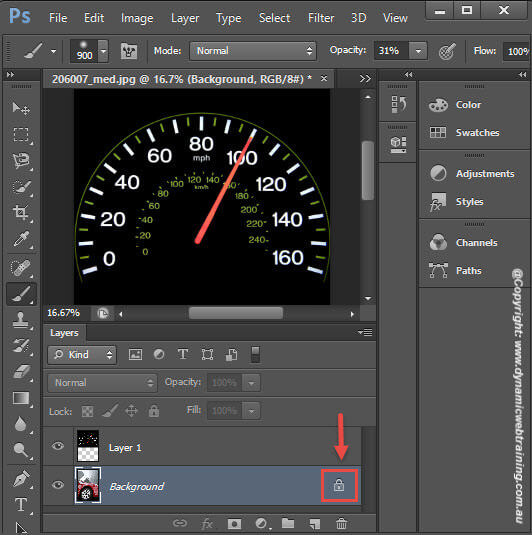
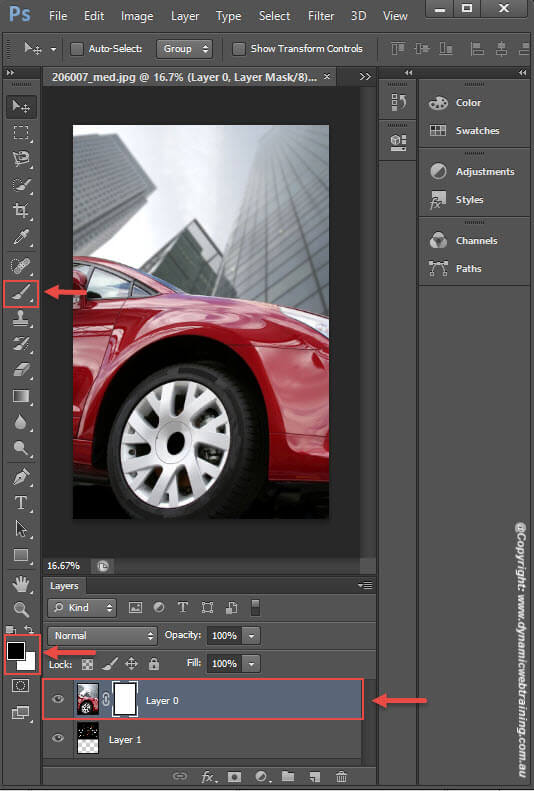
STEP 4:
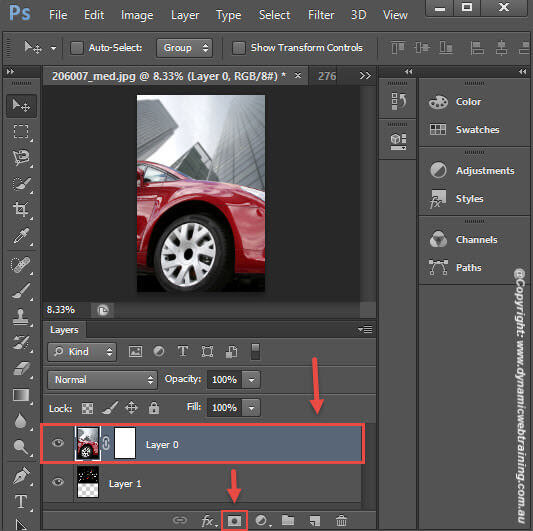
As you unlock the layer the name ‘Background’ will change to ‘Layer 0’. Move Layer 0 so that it now at the top of all sequential layers. Underneath the Layers Panel are different icons, having Layer 0 selected choose the Add Vector Mask icon.
A chain like image (indicates layer mask is linked to image) along with a white sheet (layer mask thumbnail) will now appear next to your first layer.
STEP 5:
Select the White sheet and from the left where the tools are located select the Brush Tool. Continue on and set the foreground colour to Black (very important).
Select the White sheet and from the left where the tools are located select the Brush Tool. Continue on and set the foreground colour to Black (very important).
STEP 6:
We will now use the Brush Tool to make Layer 1 (the image/s paced at the back) appear. You will first need to decide on how clear you want the image/s to look, this can be done by adjusting the Opacity values (positioned at the top).
For this tutorial the Opacity of the brush is set to 31%.
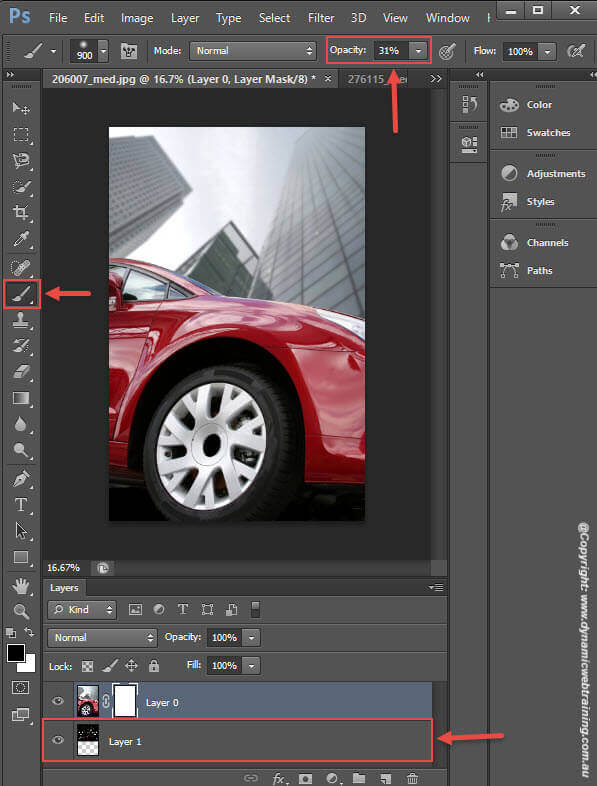
STEP 7:
Have the brush as big or small as you like and keep in mind where the image is placed. Simply brush over the top image and you will see the image at the bottom appear. If you would like the image to appear more clearly all you have to do is change the opacity and brush over.
If you are brushing and you can’t see any difference, there could be two reasons:
- Your foreground colour has not changed and is still White. Change this to Black.
- You have not selected the White Sheet, this is important.