
Data Merge, also called Mail Merge, is used to combine a data source file with a target document. This is initially used to generate letters, mailing labels, letter heads, envelopes, etc.
Steps for Data Merge in InDesign
STEP 1:
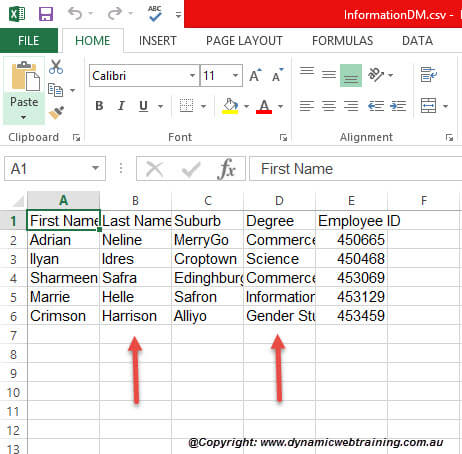
Ensure that you have preliminary data ready in a Microsoft Excel Worksheet. This will be the data source file that holds the information that changes in each iteration of the target document, such as the names and addresses of the recipients of a form letter.
STEP 2:
You will need to save this file as a CSV file. You can do so by going to File in the Menu Bar and then selecting Export Change File Type CSV (Comma delimited .*csv).
Note: A CSV File is a comma-separated values file, which allows data to be saved in a table-structured format.
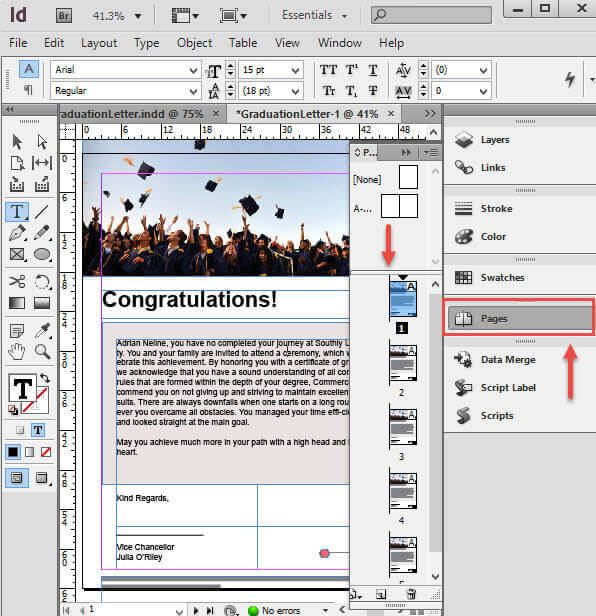
STEP 3:
You will need to have a document ready in Adobe InDesign, which is known as the target document that contains the data-field placeholders, etc.

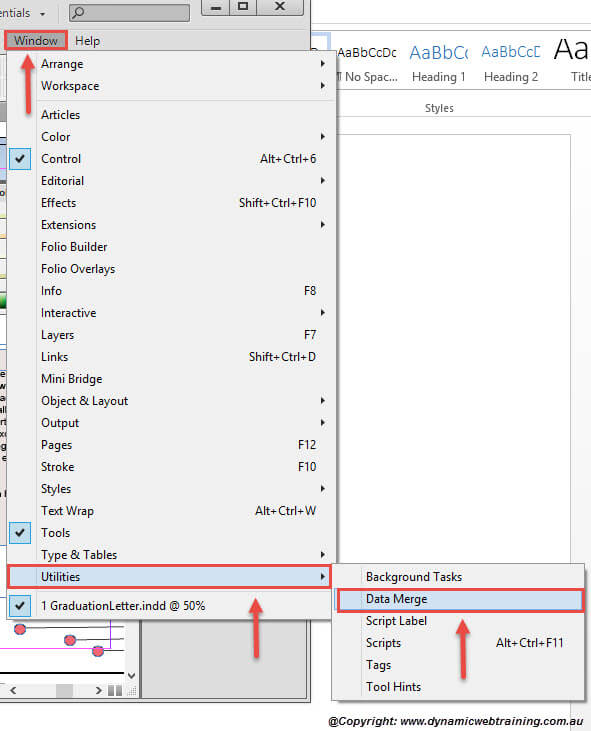
STEP 4:
Continue on by selecting Window from the Menu Bar then choosing Utilities –> Data Merge.
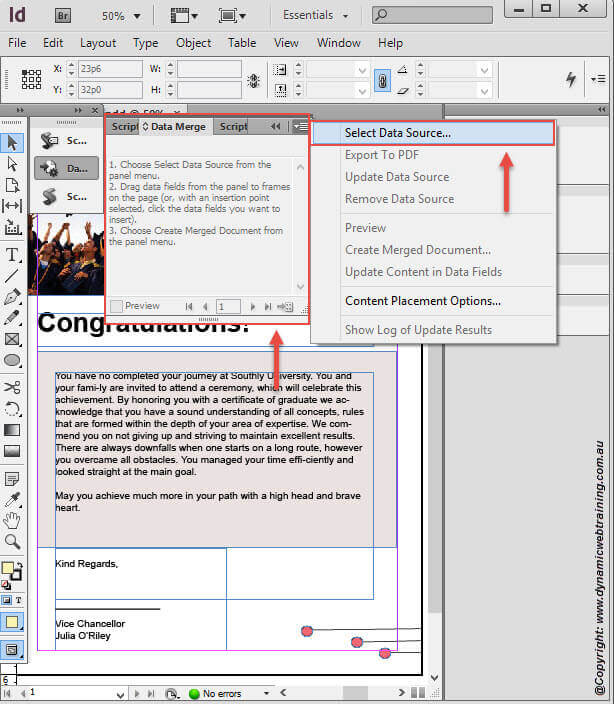
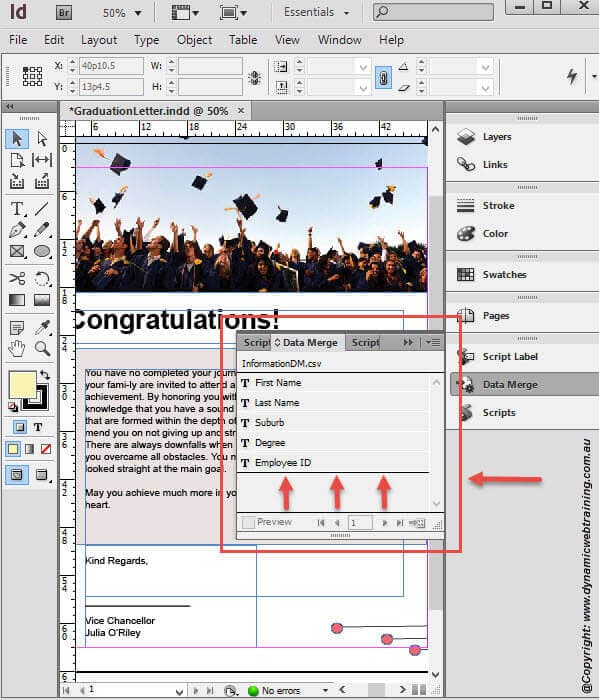
STEP 5:
There will be a small box that will open up for Data Merge, select the further options icon and from the drop-down choose Select Data source.
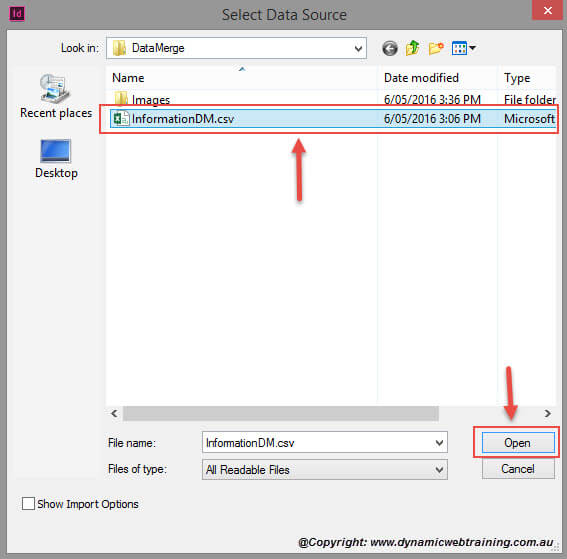
STEP 6:
The Select Data Source window will open, where you can choose the CSV file you saved earlier. Once you have chosen the file, press Open. This will link your CSV file with the InDesign file.
STEP 7:
As the window closes and you return to the Data Merge drop box, you will see numerous data fields in the Data Merge panel.
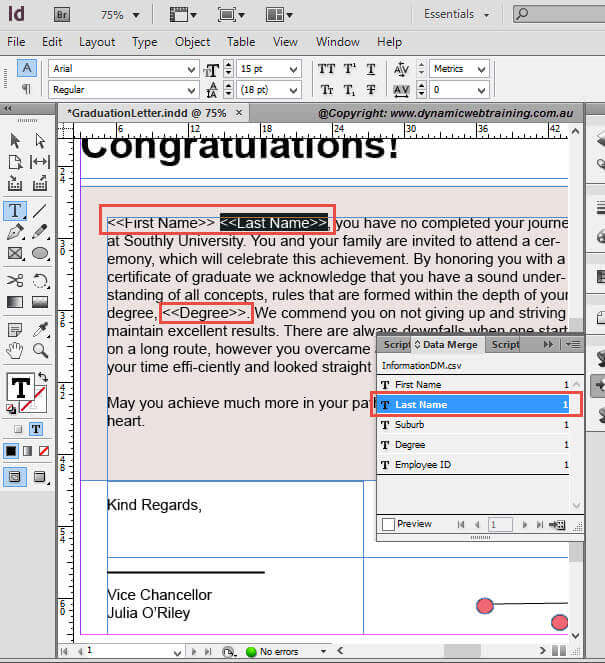
STEP 8:
In your InDesign document, within the text boxes, click and enter wherever you want the fields (First Name, Last Name, Suburb, etc.) to show up. You will see that as you select the fields, they will appear in the following format:
<<Last Name>> – Last Name
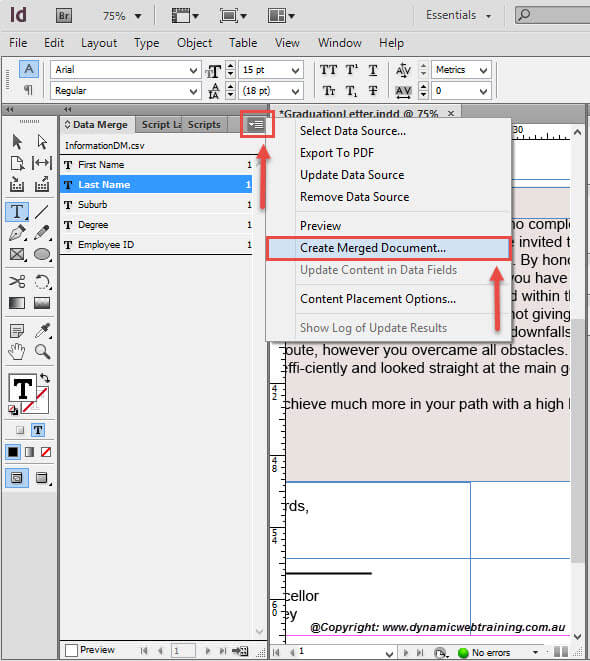
STEP 9:
Once you have completed adding the links, within the Data Merge panel, select Create Merged Document from the further options.
The merged document will be the final InDesign document that will hold the boilerplate information from the target document.
STEP 10:
The Create Merged Document pop-up box will open up, and once you have reviewed all information (there is no need to alter any of it), select OK.
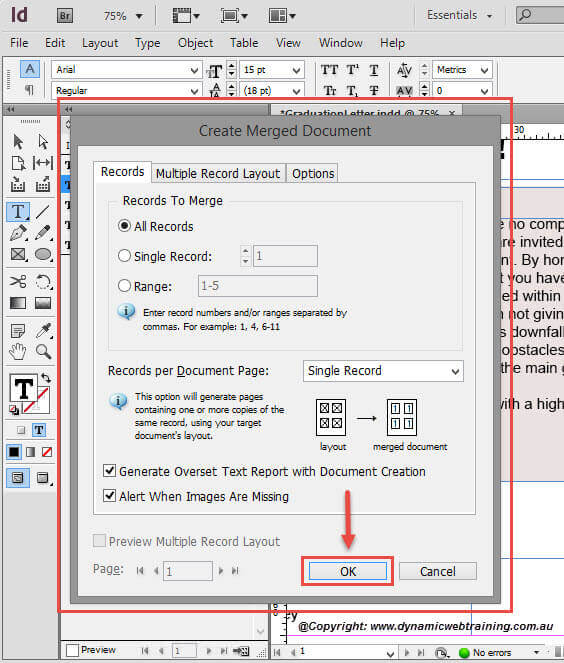
STEP 11:
It will take a few seconds to create the merged document, followed by a pop-up box indicating whether any text has been overset. Alongside InDesign, you will create numerous pages containing separate information that corresponds to the Excel file. Once complete you are free to export the file and use.
Dynamic Web Training is Australia’s leading provider of instructor-led InDesign courses.